Barn doors, antique front doors, and vintage interior doors can bring charm to any space you are designing on a budget. You can use them as actual doors, mount them to walls like a piece of art, or upcycle them and use them as headboards or tabletops. Finding old doors can be fun like a scavenger hunt. You can find them at antique shops, Facebook marketplace, Etsy, junk shops, etc.
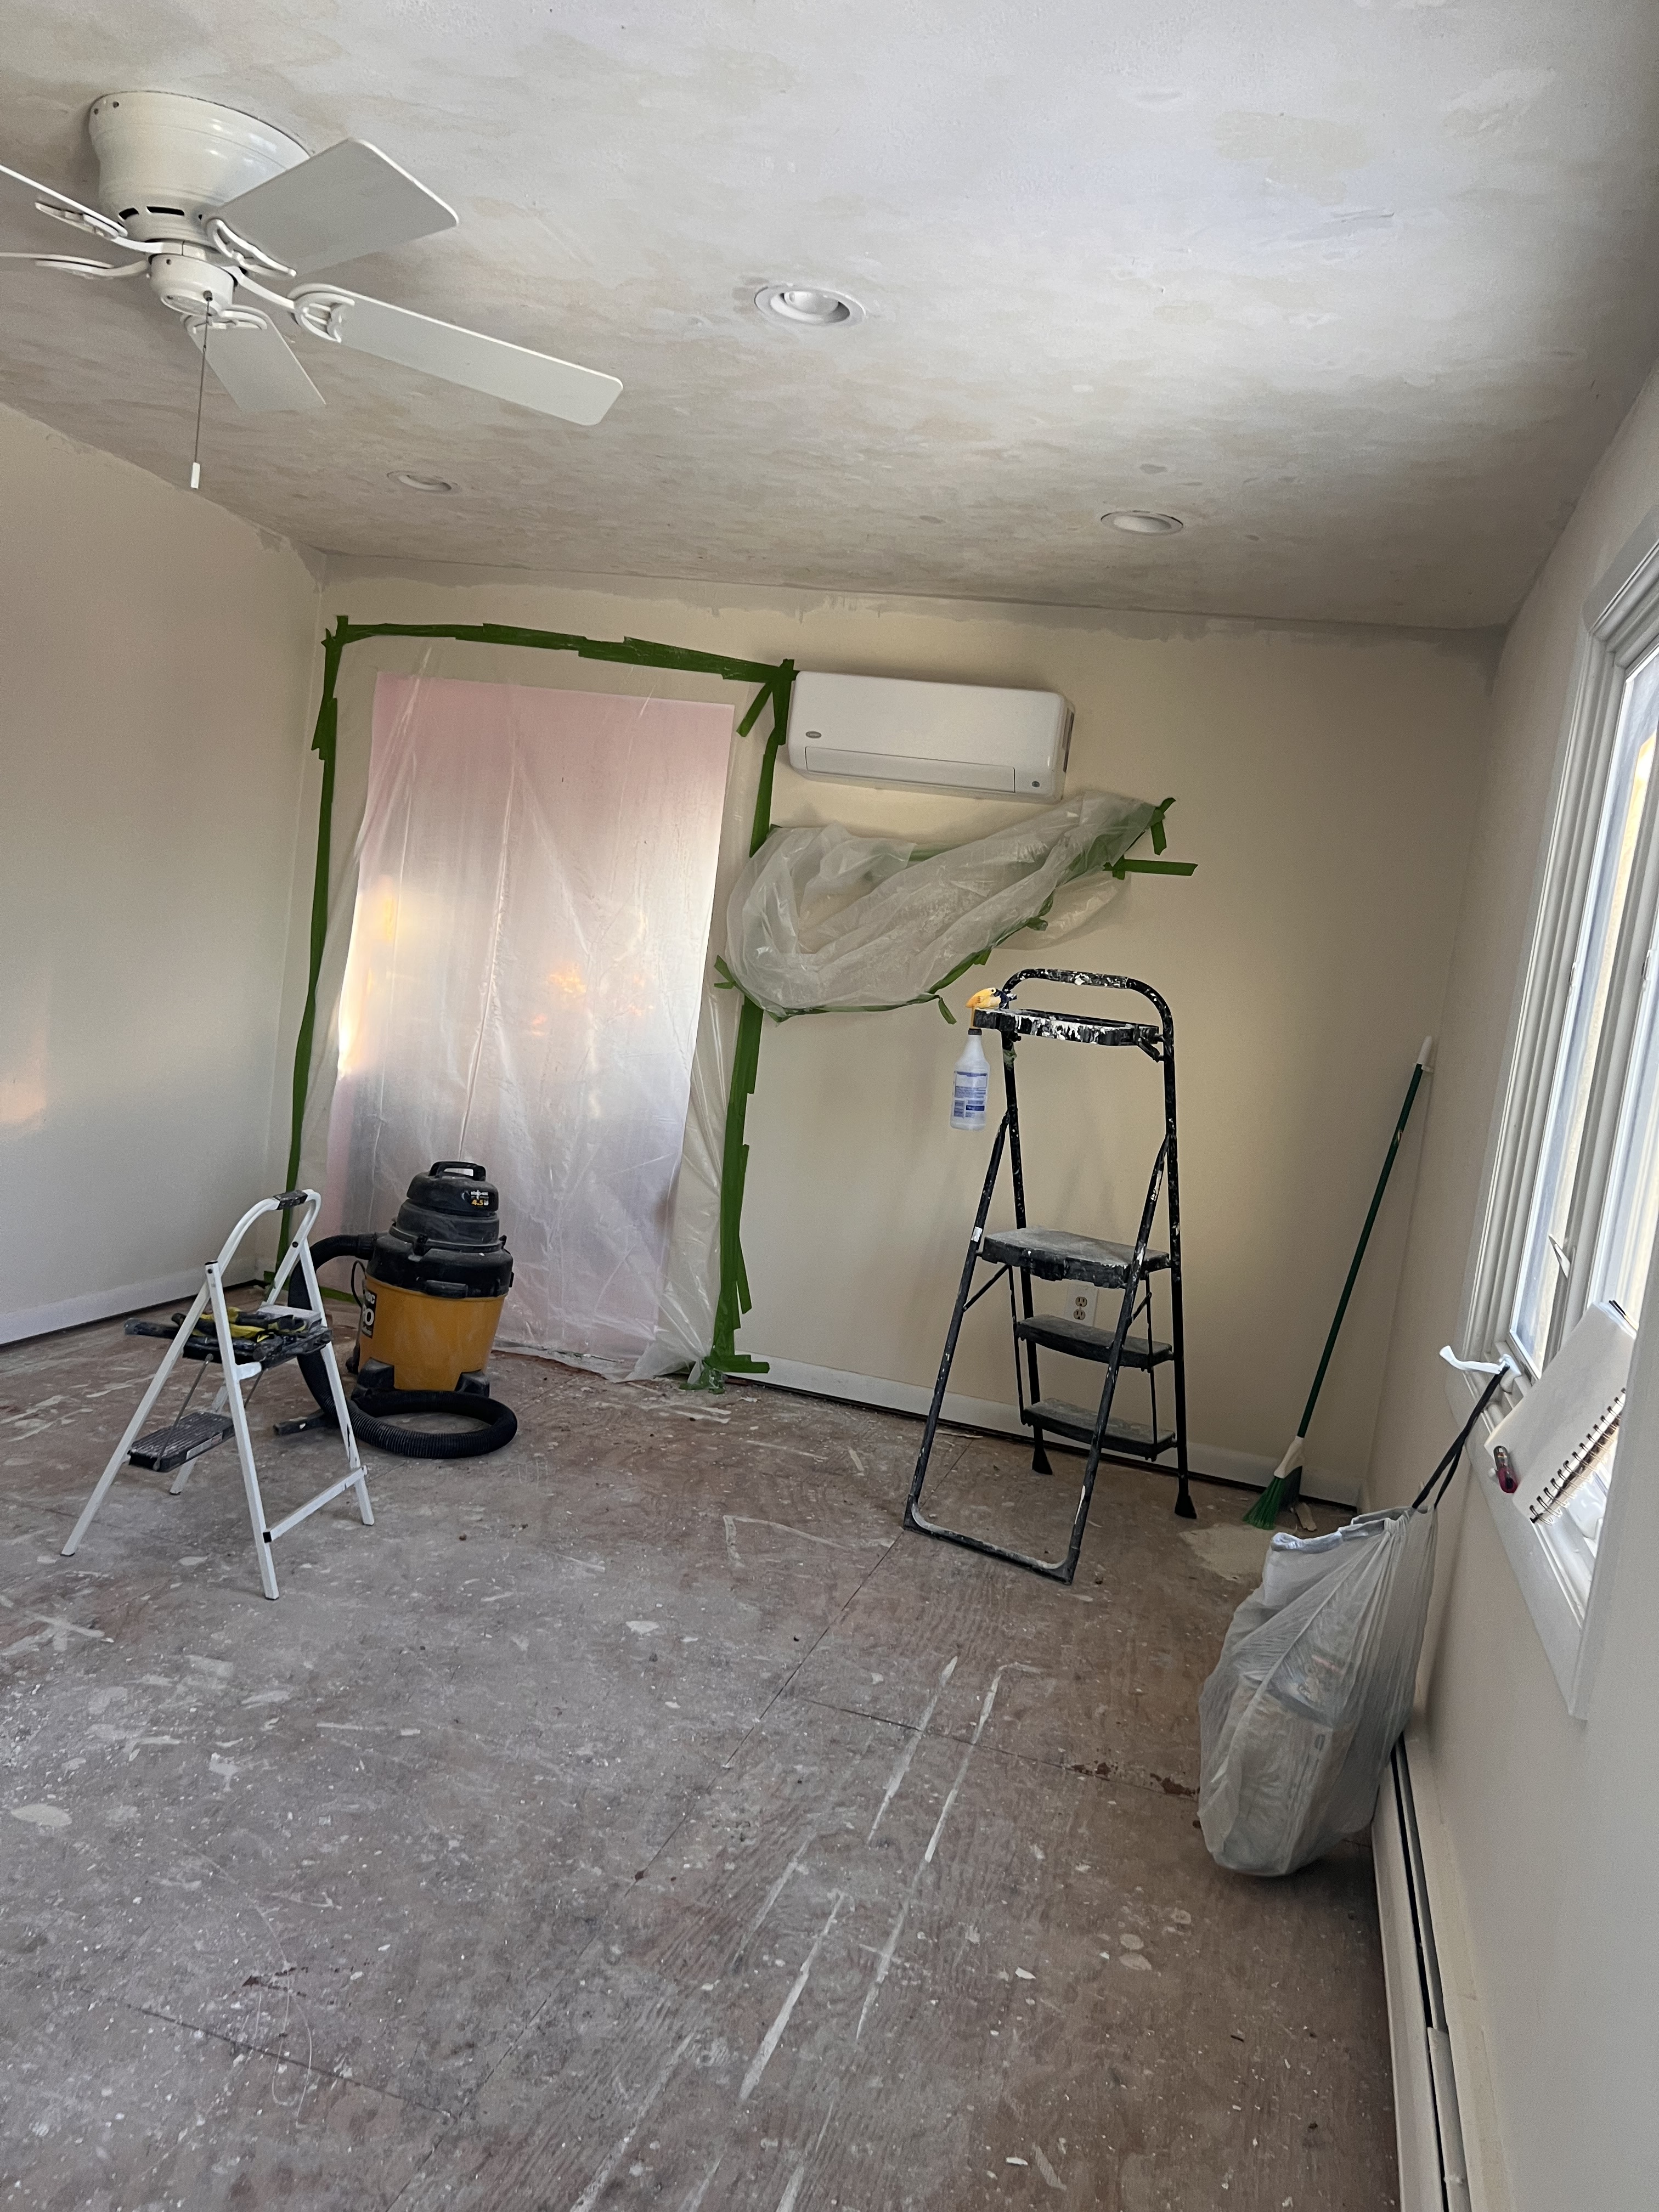
I had a 48-inch-wide and 82-inch-high entryway into my primary bedroom closet. My bedroom has an extremely large closet space with a small window, and I wanted to ensure I maintained the natural light coming through to the bedroom. (Besides ocean proximity the size of this closet was the second reason why I bought my house!) See entryway pics below before any renovations were completed to bedroom or closet.
Months ago, I began my quest for the perfect vintage doors. It took patience and a long 5-hour drive before I found the perfect pair, but it was worth the wait and gas money. Tip: It is important to measure your space and have some idea of what type and size of doors you are looking for even early on in your project. And be patient, sometimes you will come very close to finishing a space before you find all of the perfect elements. If you are like me, you get obsessed with finding the piece you imagine even before you know it exists. Knowing I wanted to keep the light I was looking for either Indian Doors, vintage screen doors, or old French doors for this opening.
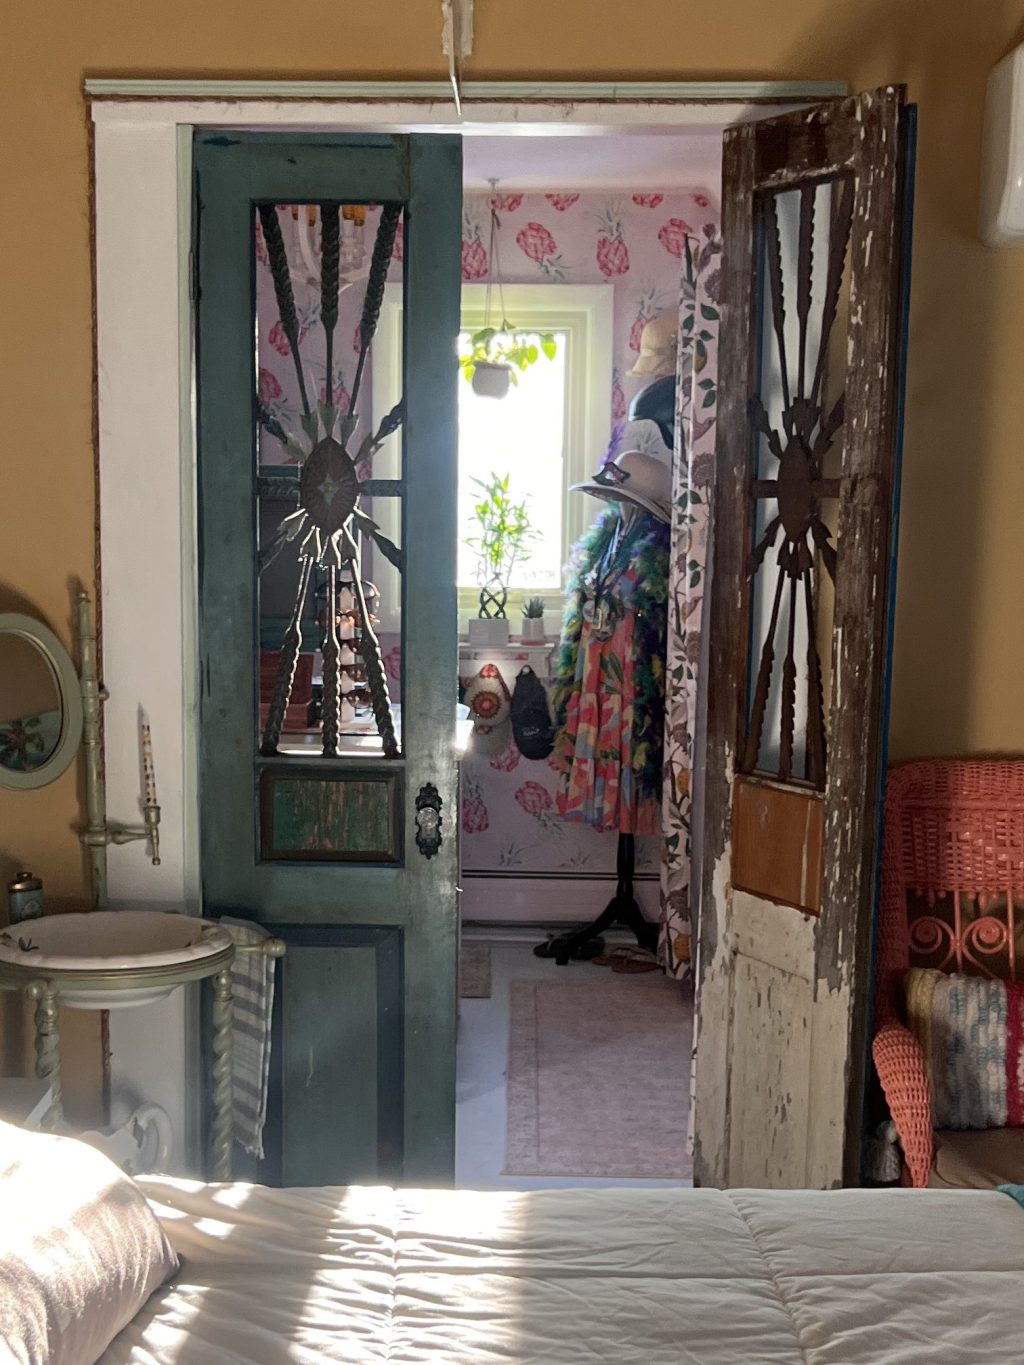
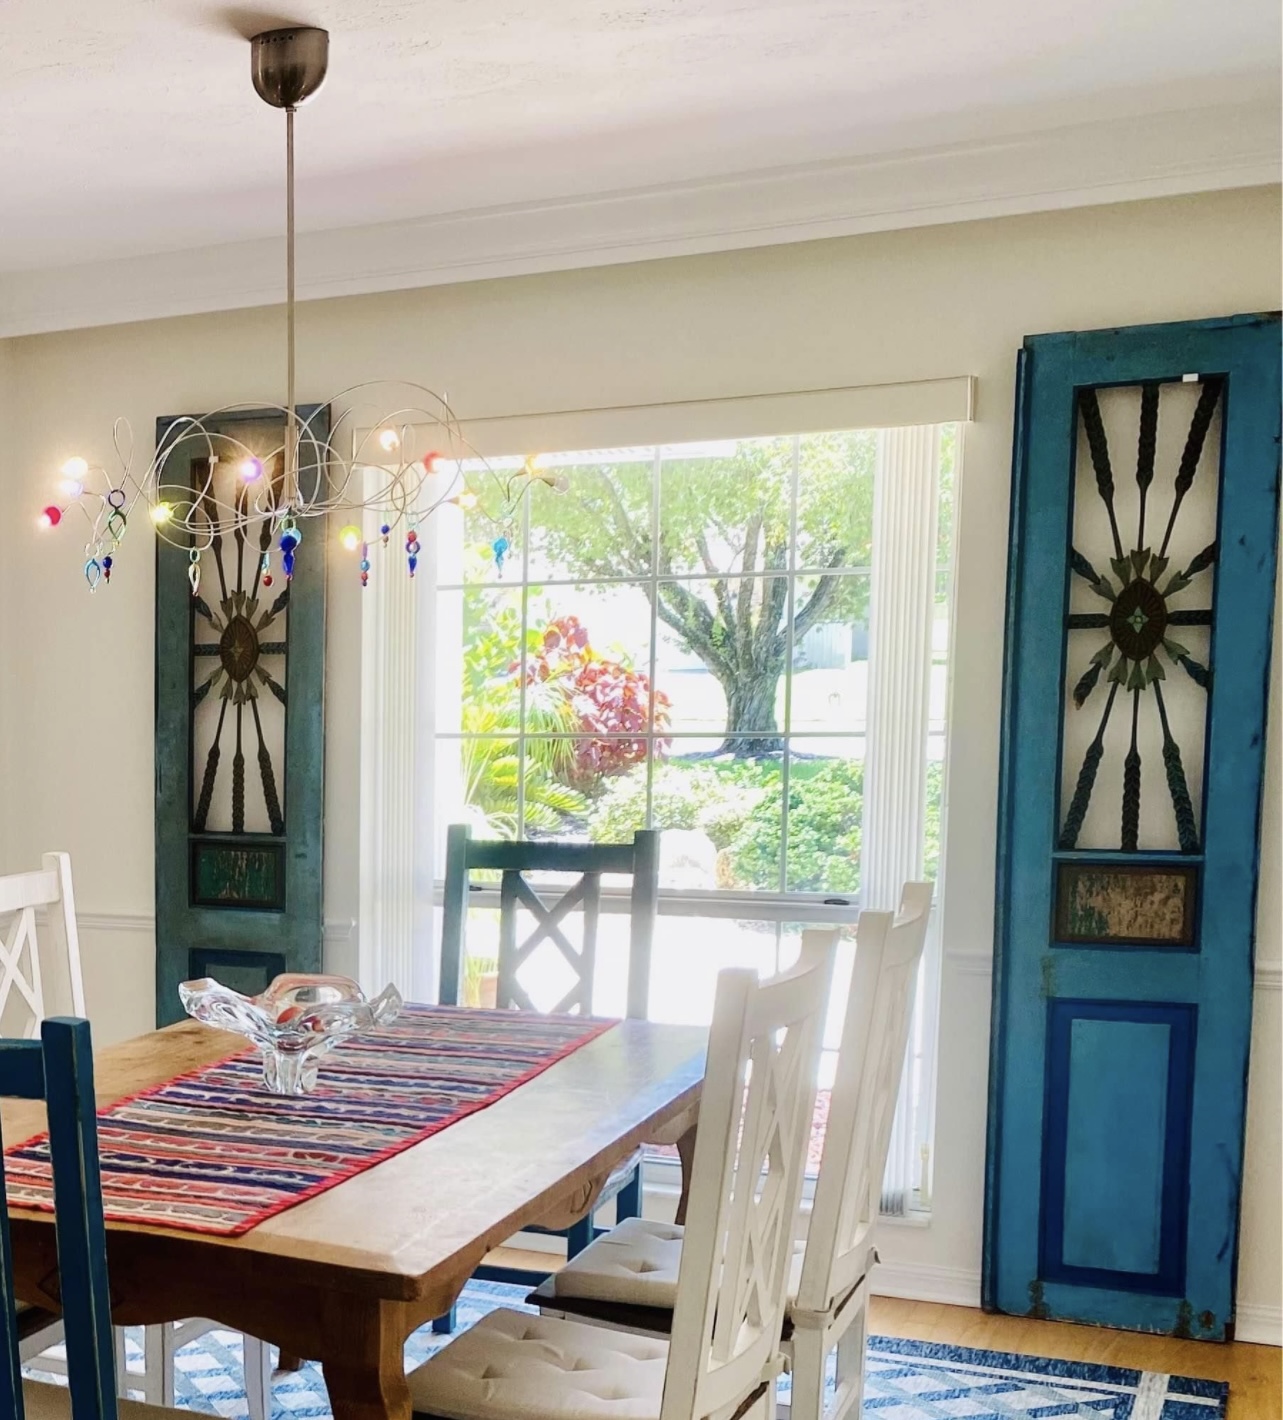
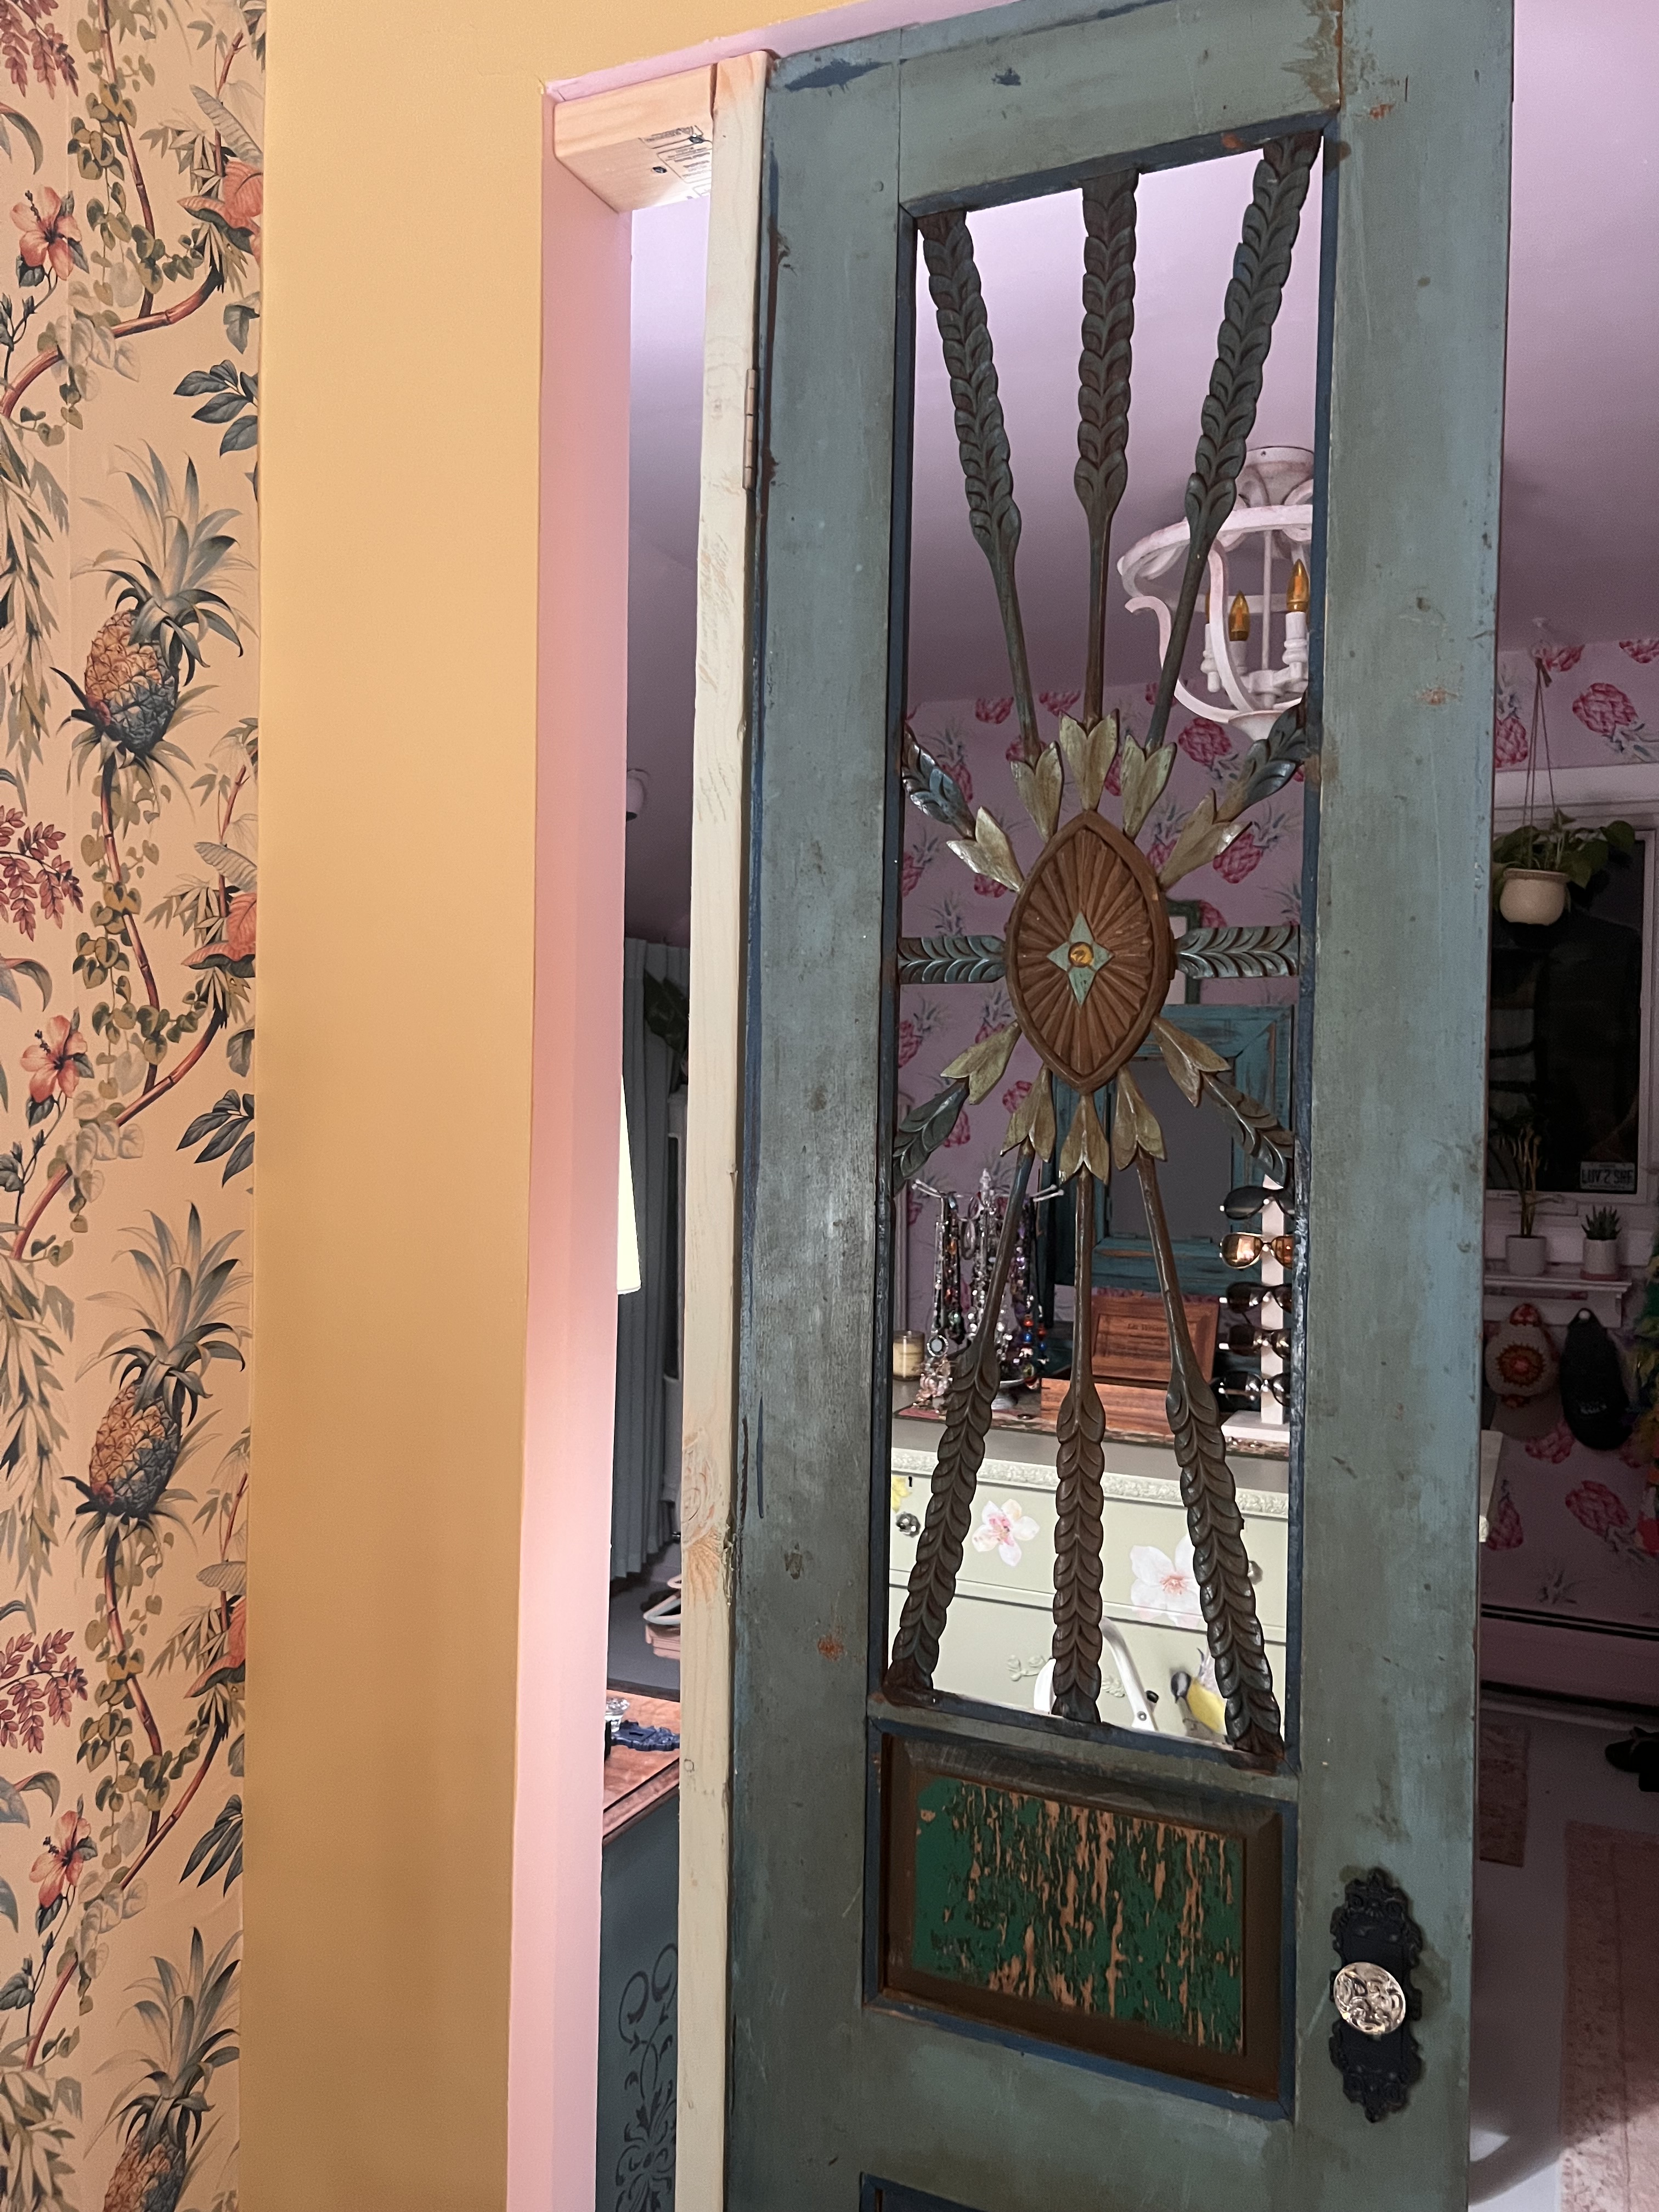
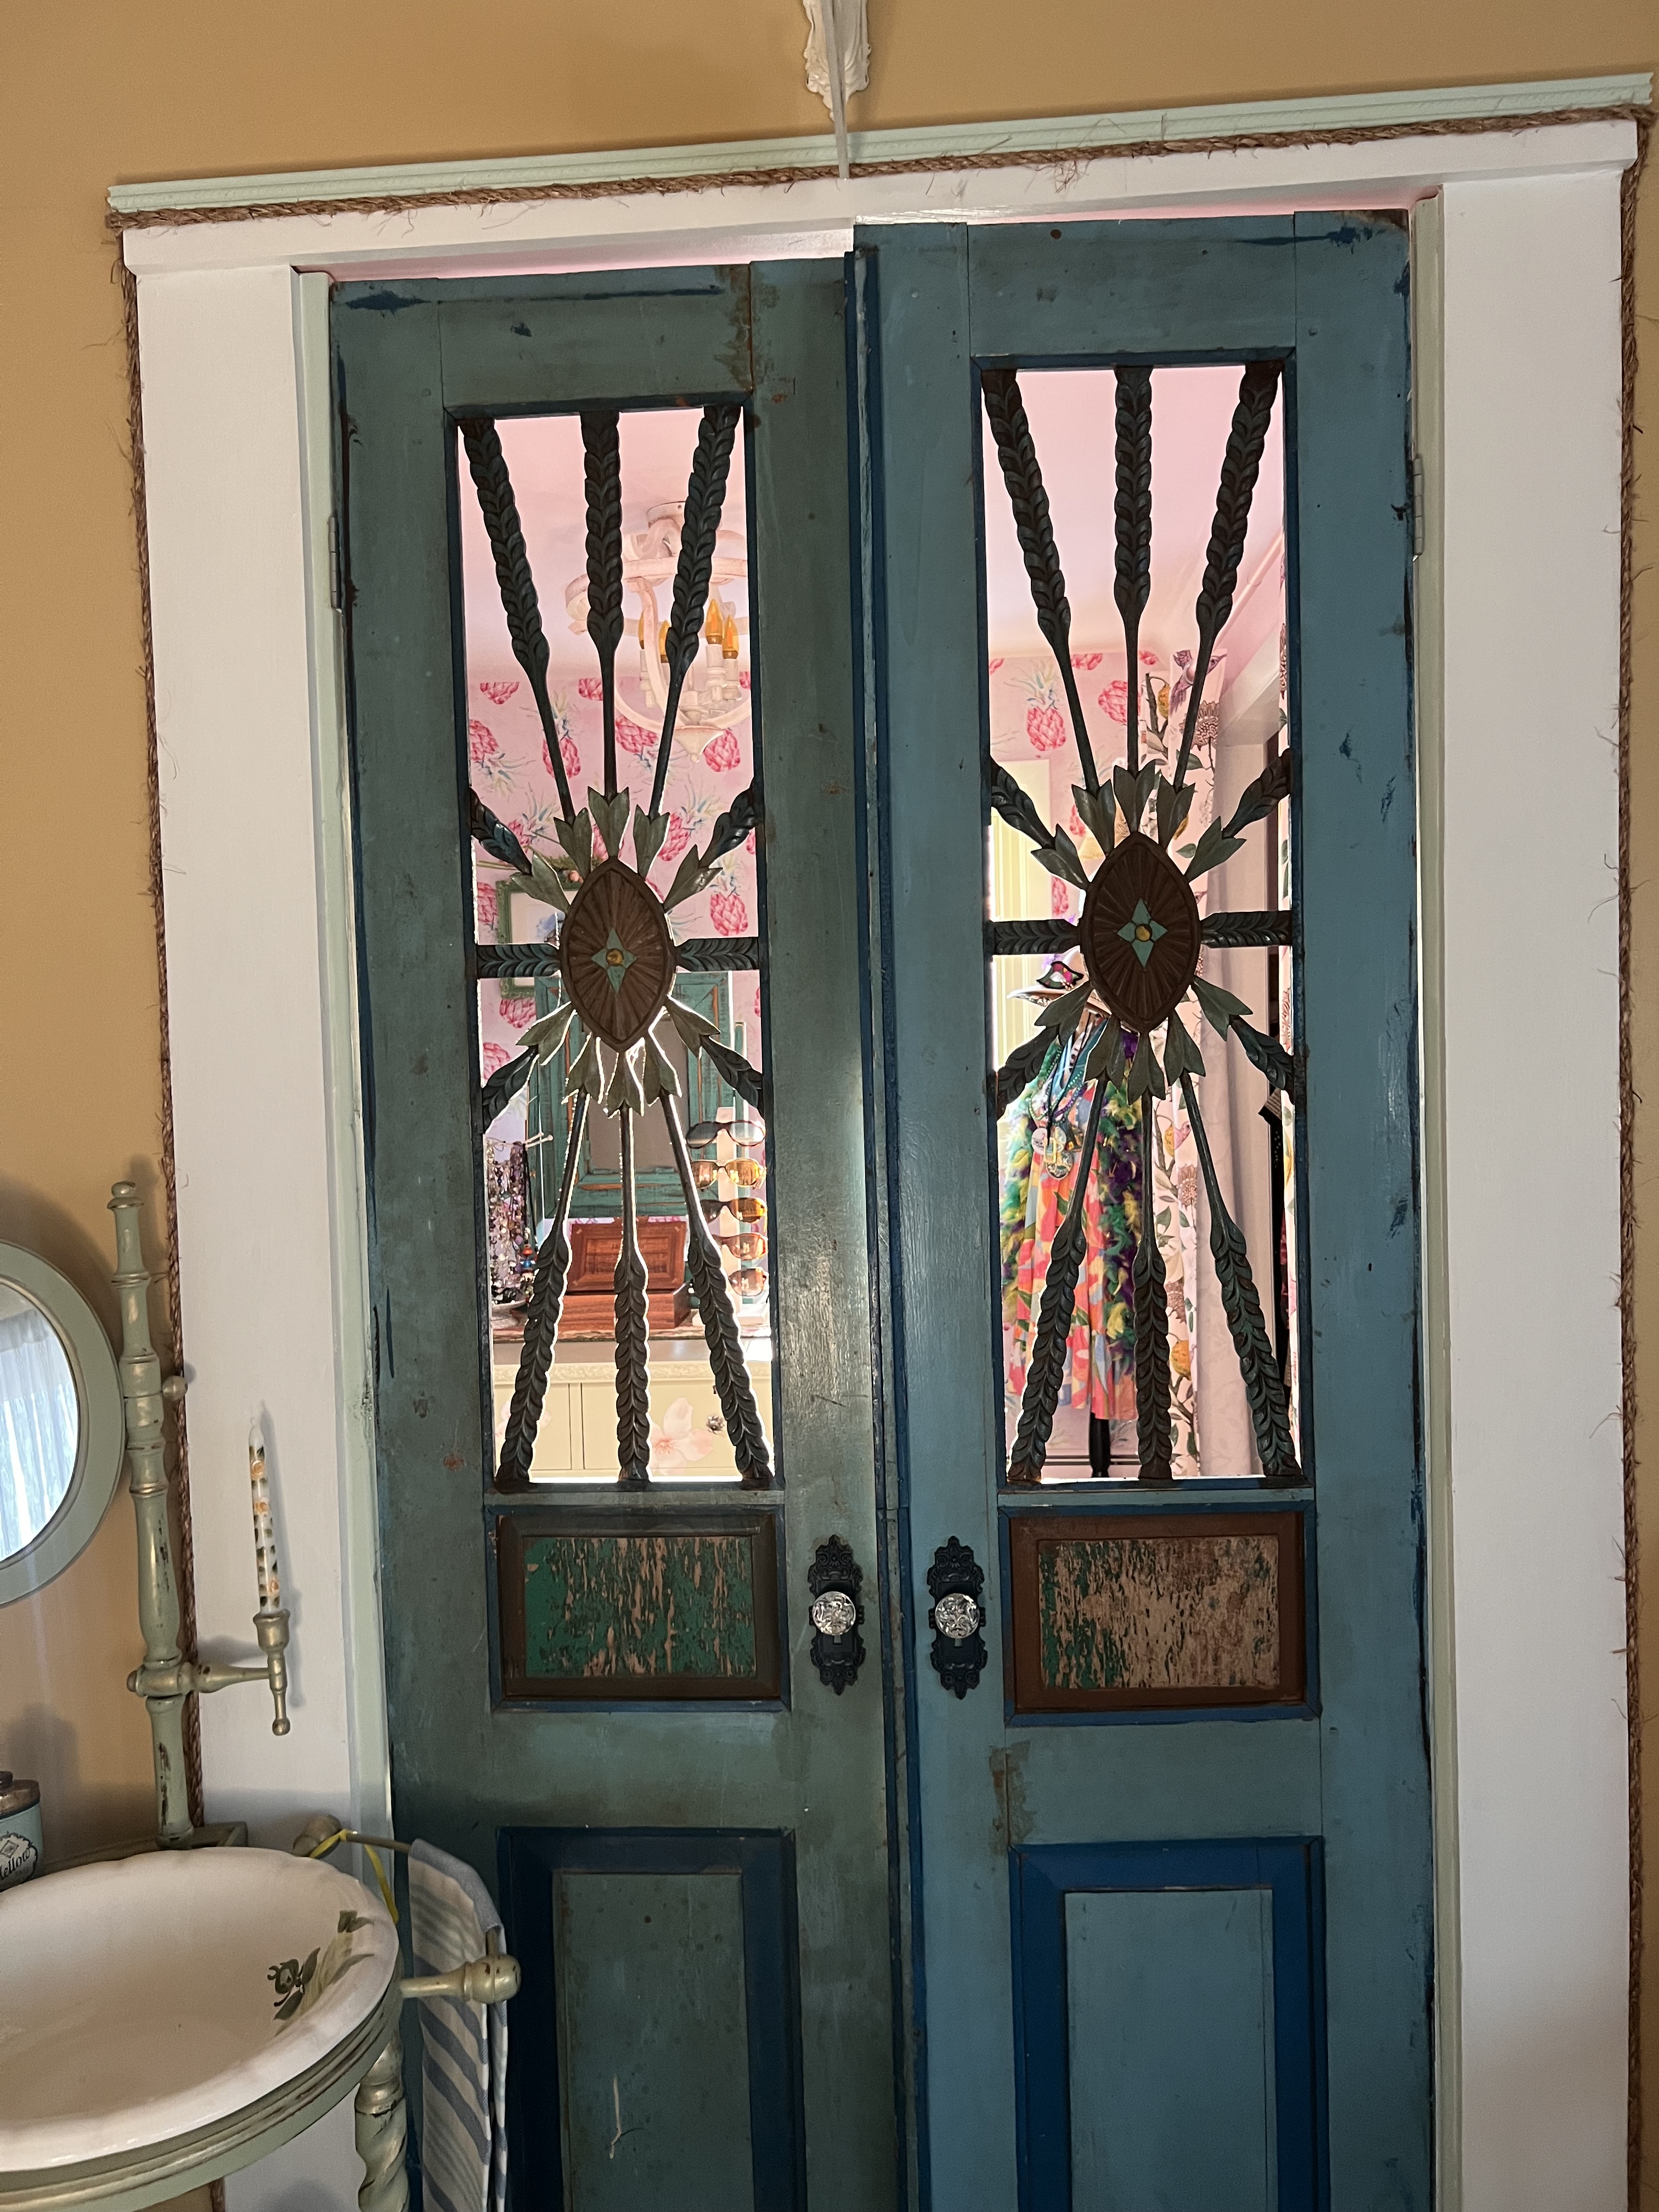
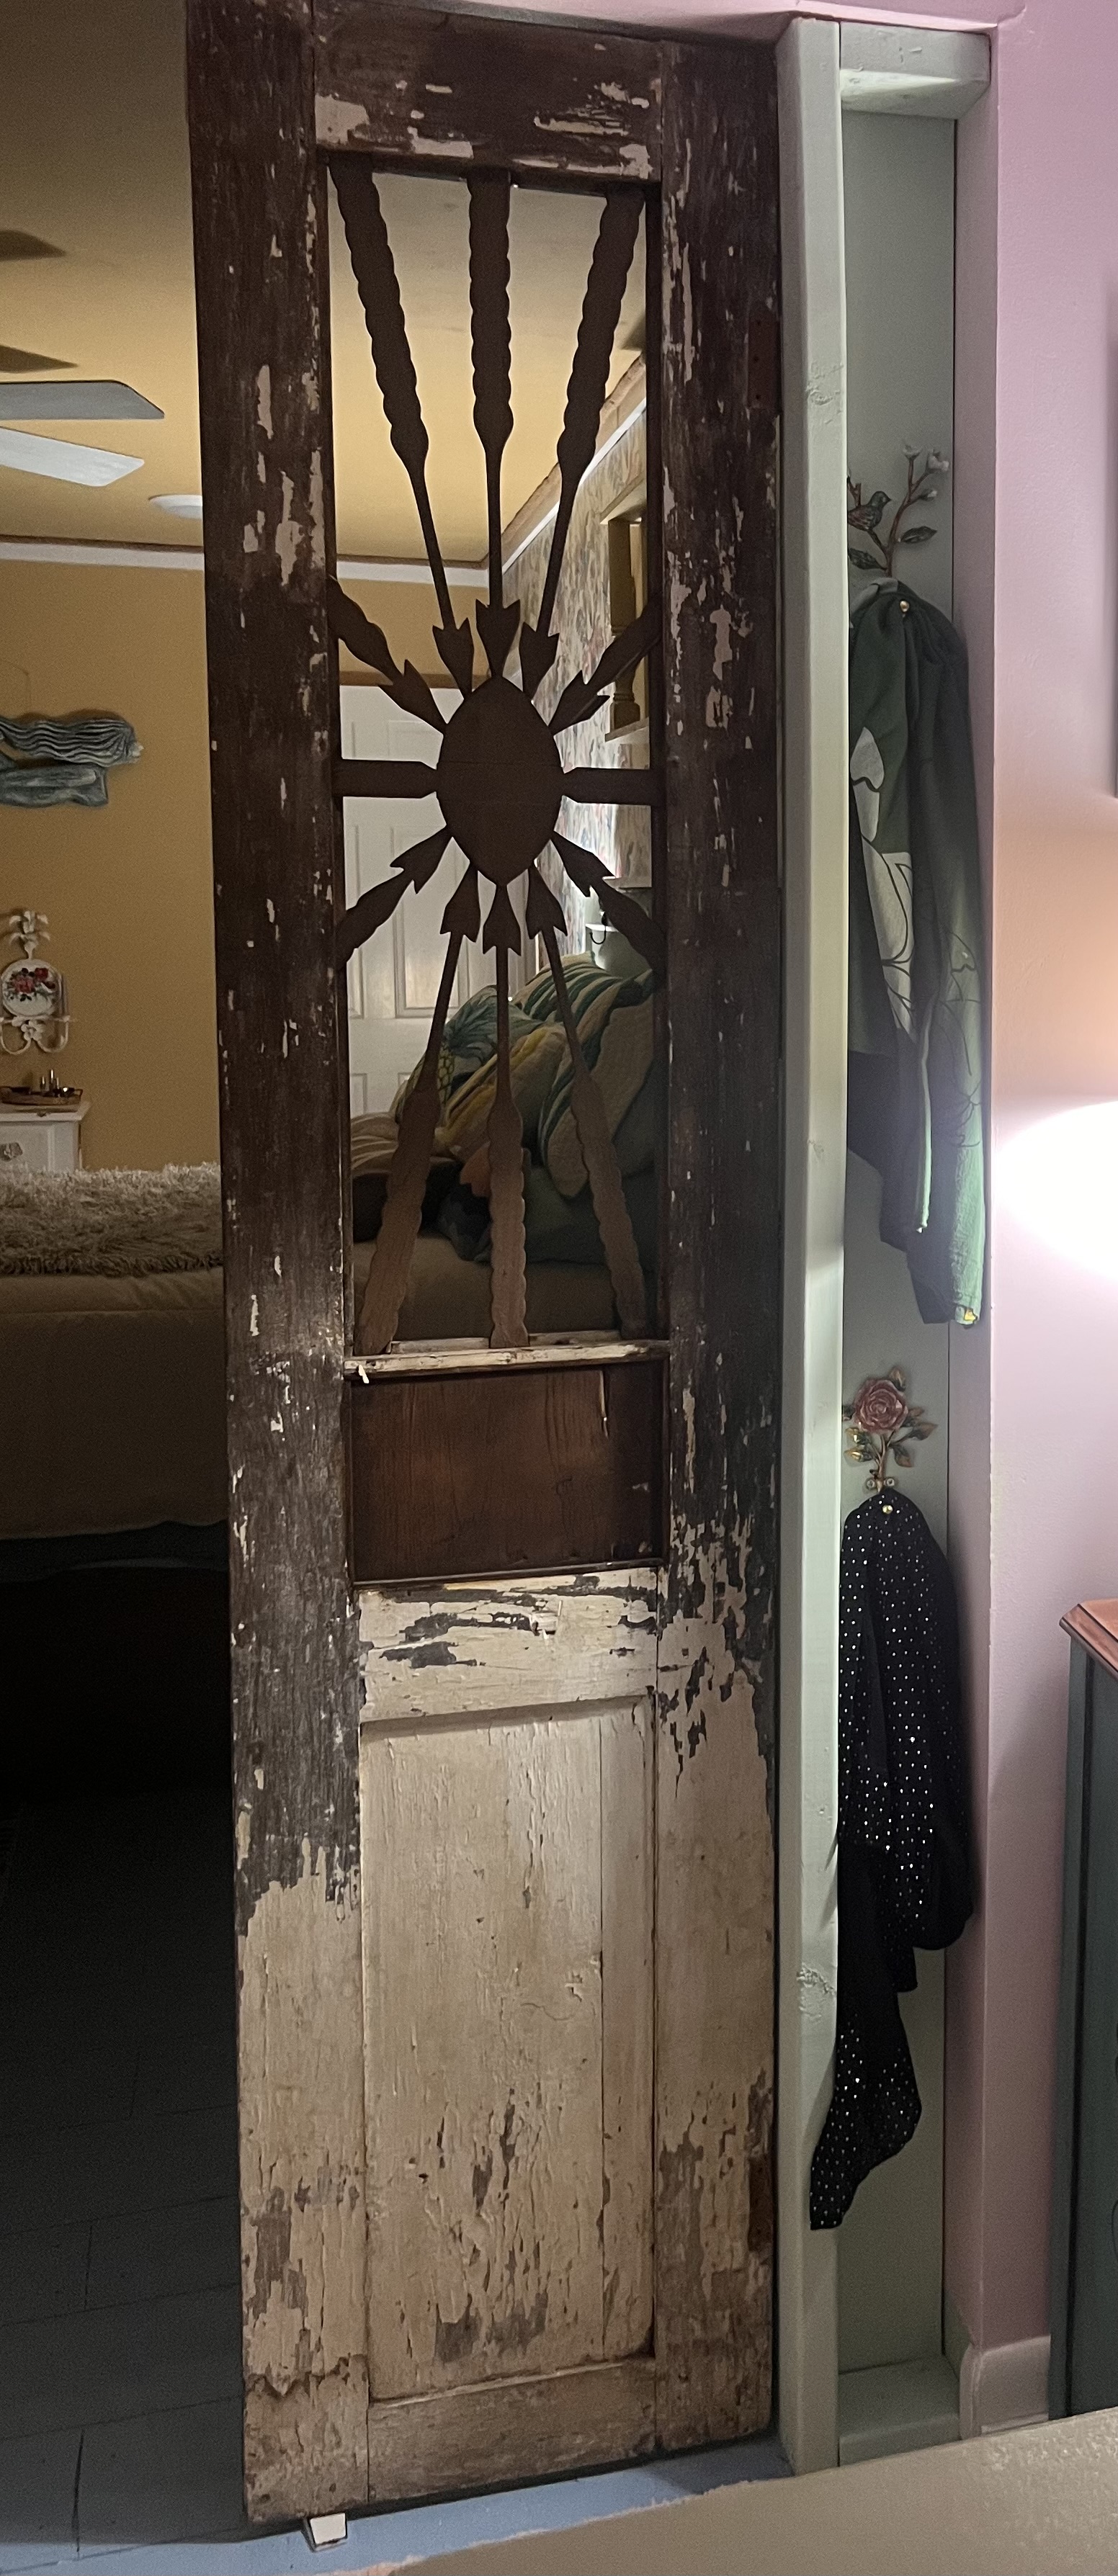
I found the pair below on Facebook marketplace in upstate New York. The previous owner had them displayed leaning against her walls for almost 20 years. She shared she had purchased them in New Orleans and estimate them to be about 100 years old. They are all wood, hand carved, and much heavier than expected. These doors have the perfect shades of blues and turquoise for my beachy surf style and other side of the doors were white and very chippy showing their age. Just imagine all of the people who may have passed through them at one point.
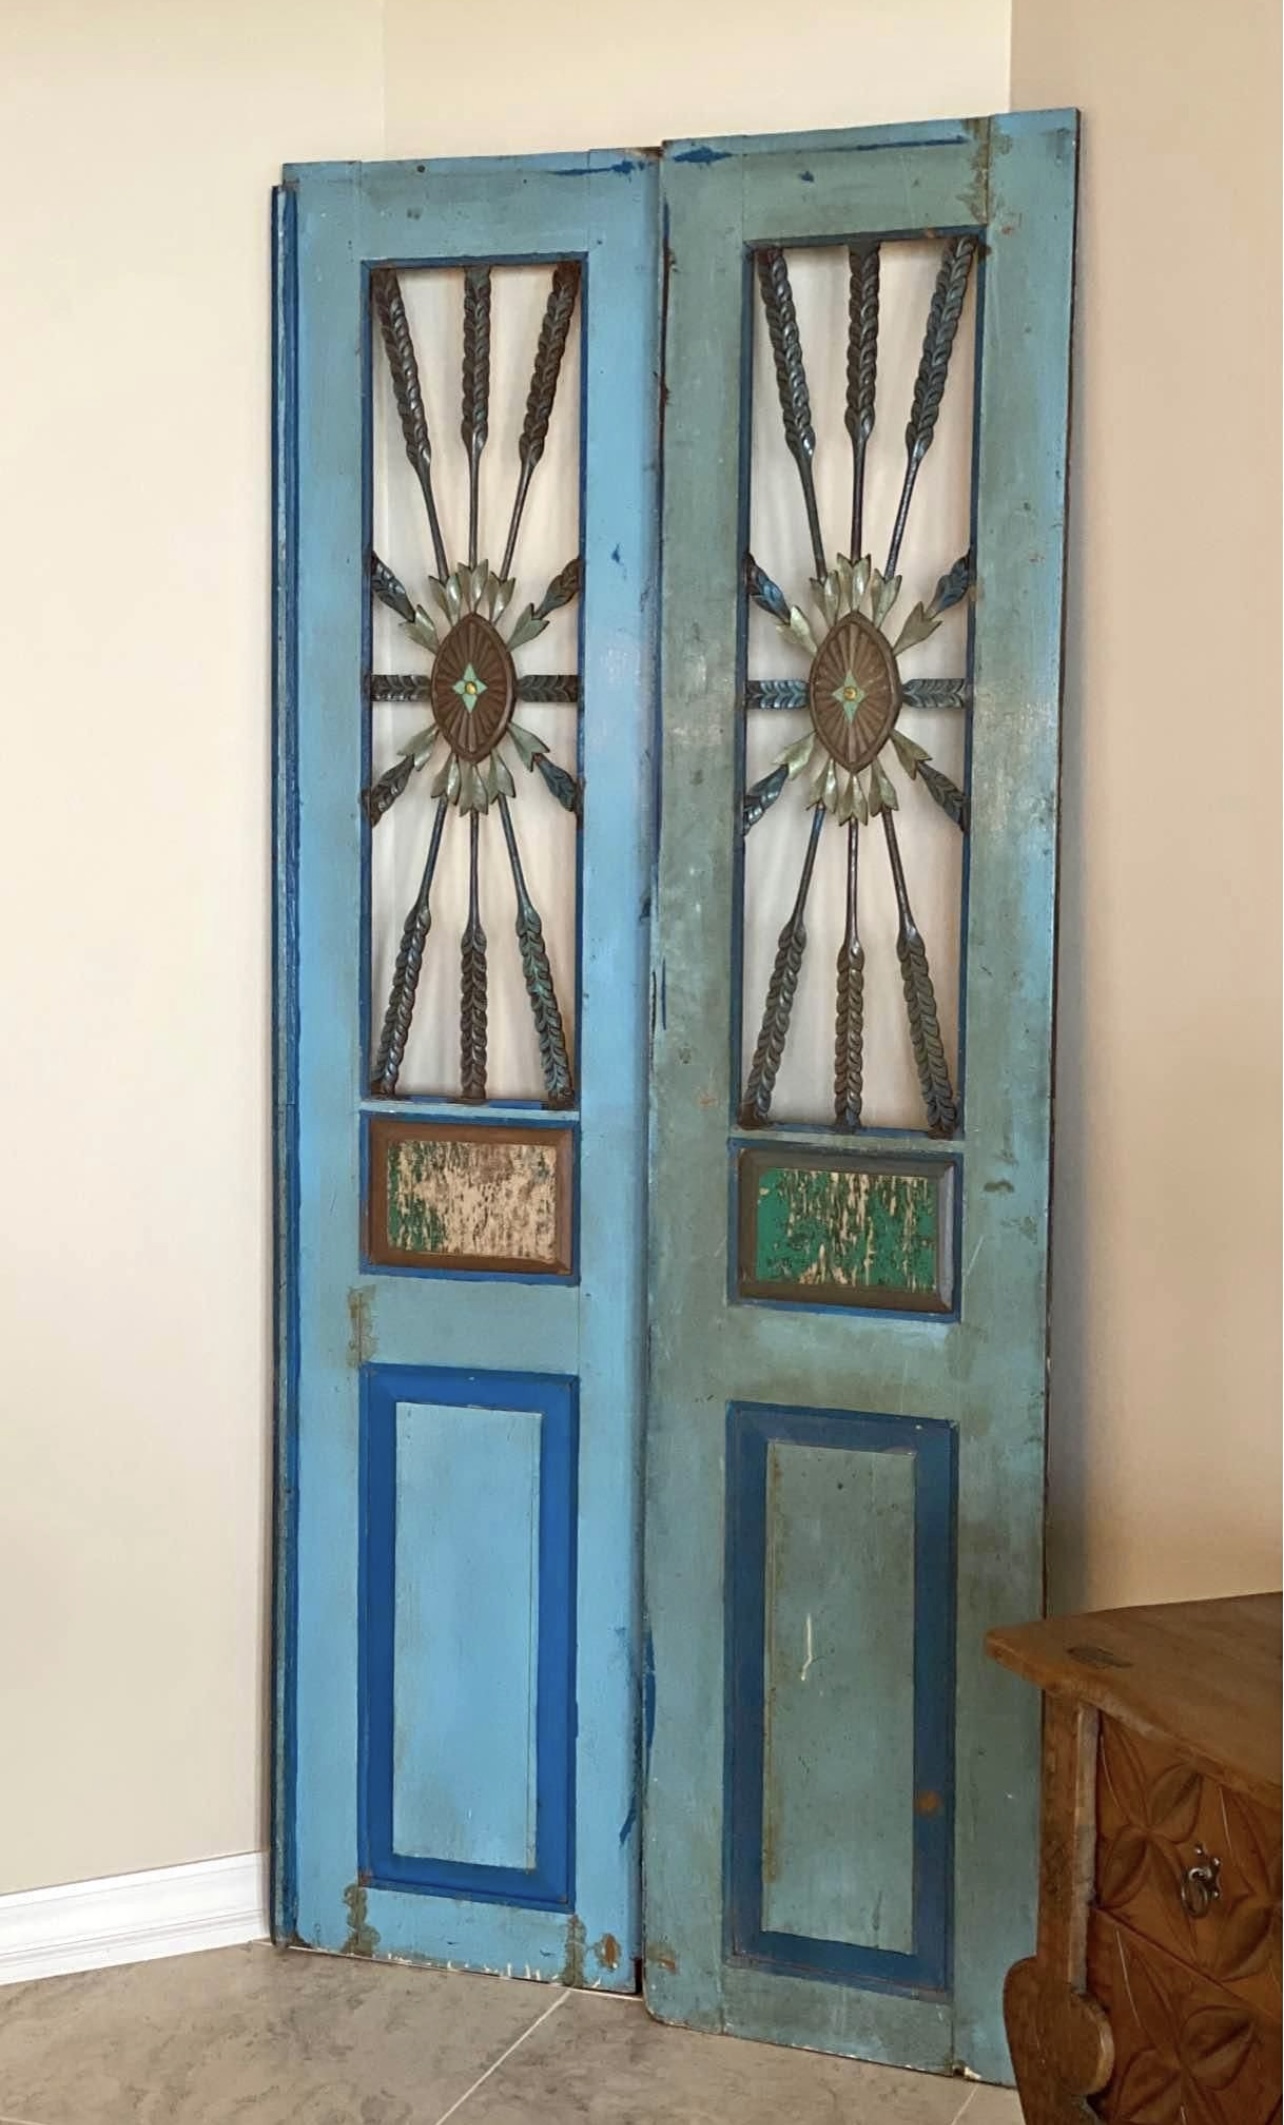
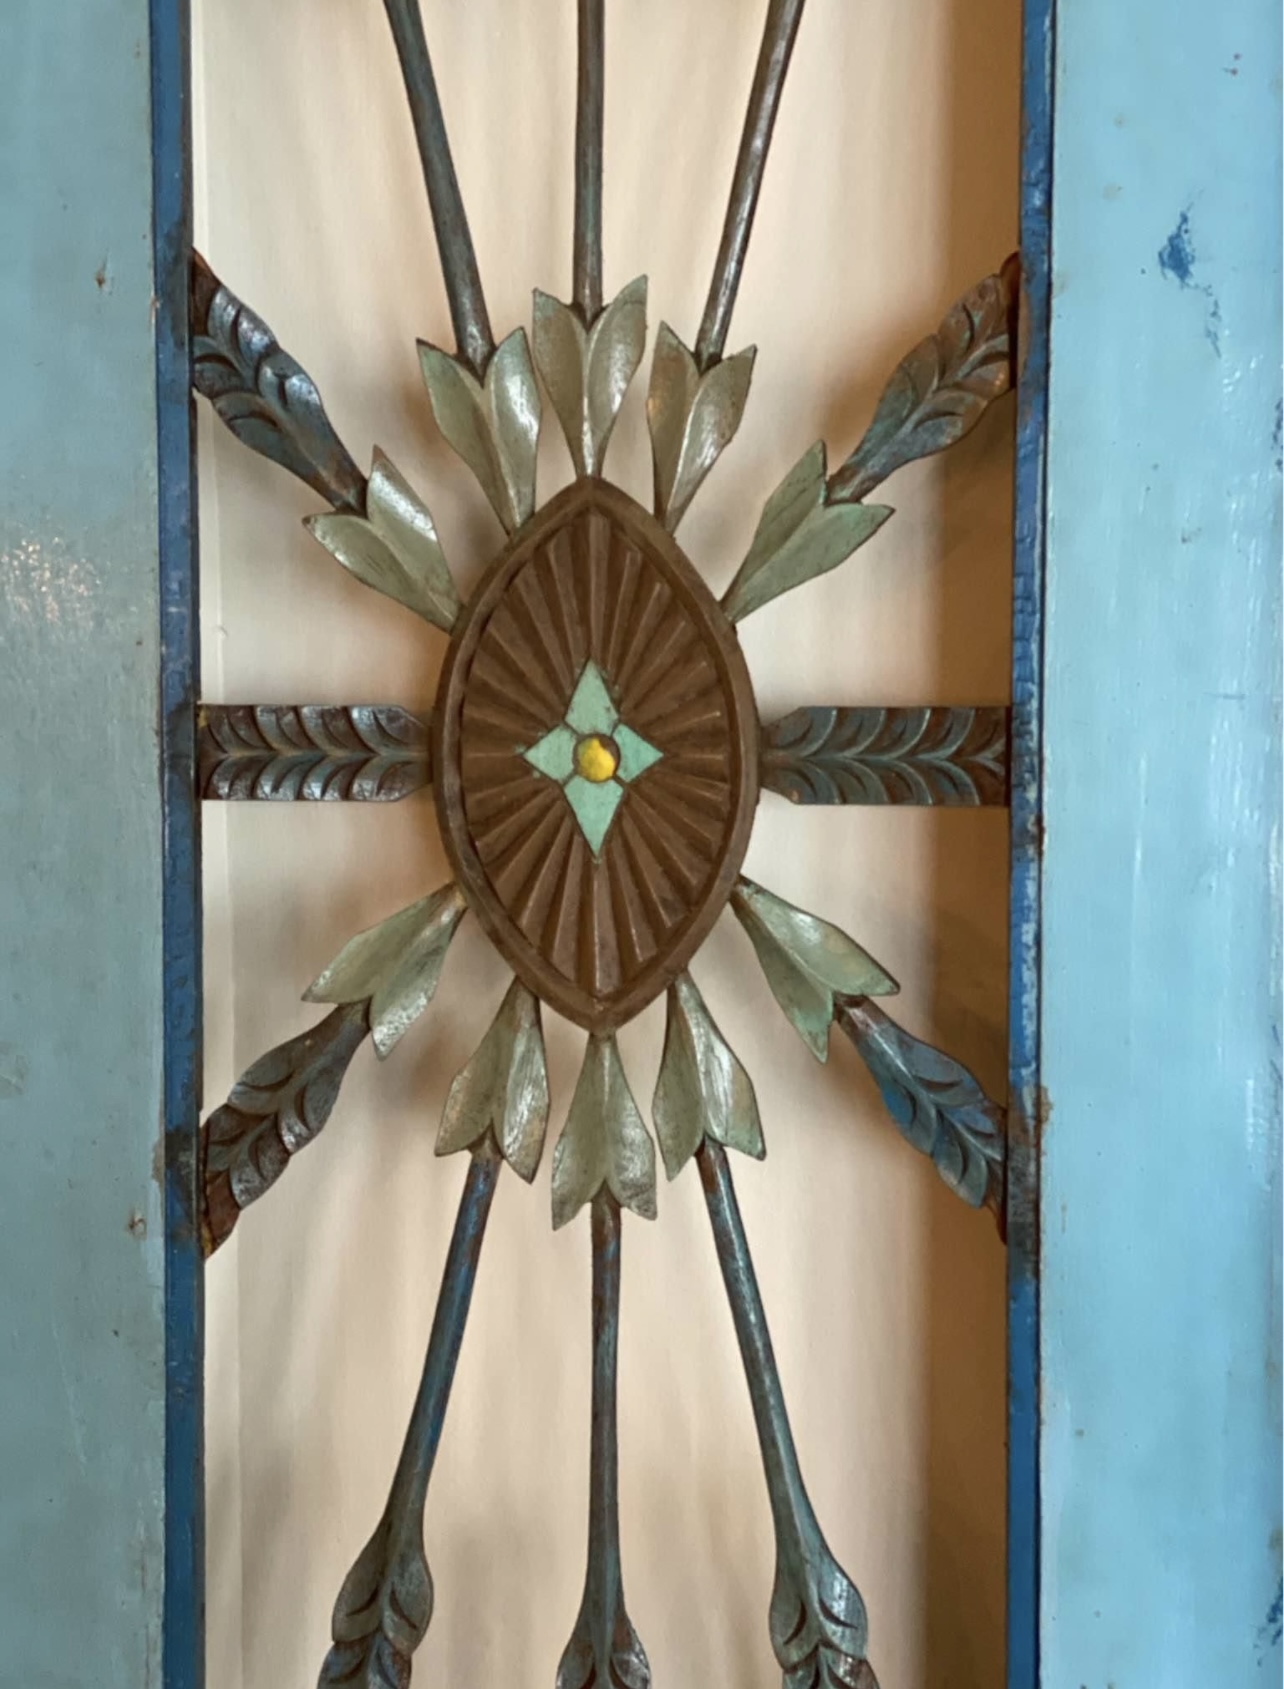
They measured 18.5″ (L) and 19″ (R) wide and both were 81.5″ inches high. I knew the height was perfect limiting my need to create an entirely new door frame (a huge sigh of relief as a DIYer who knows nothing about making door frames). I did not want a door I had to dramatically change to fit the space but rather find a pair that fit the space with a little help.
Once both rooms were painted and ready to take the new doors, I began the task of building a frame. I started by measuring the doors as if they were closed. This is the total width of the doors together. For me, this was 37 inches. I added a 1/2 inch to each side for hardware because I did want the doors to open and close. The 1/2″ on top and bottom was perfect for the doors to have space to open and close. I was left with a 10-inch gap. I decided to center the doors making a 5-inch gap on each side. It is good to have a helper hold the doors in the space before you make decisions like this. I had my sons hold the doors in place to double check I liked how they were going to look.
DIY Door Frame
I cut down (2) 8ft 2x4s to exactly 82″ for each side. I then used the leftover pieces from the cuts to make small 2×4 pieces for both the top and bottom gaps (see pics below). Tip: For me it was easier to start with the left door, hold the right door up to ensure I would be able to install both doors easily. I am pretty sure a professional would do this differently, but as a DIYer and working with vintage pieces, I find taking my time makes it less overwhelming and frustrating.
Make sure you use long screws here (2.5″-3″) and after you have the 2x4s up ensure they are sound and stable by giving them a quick tug. I also added a quick coat of paint at this step to avoid painting my hardware later. For hardware, I found some narrow steel door hinges. For interior doors, I was not worried about rust, but rather I wanted to ensure the hardware was strong enough to hold the heavy old doors. You can find good hinges at any hardware store. I also found evidence of old hardware at some point and strategically placed my hardware at similar points.


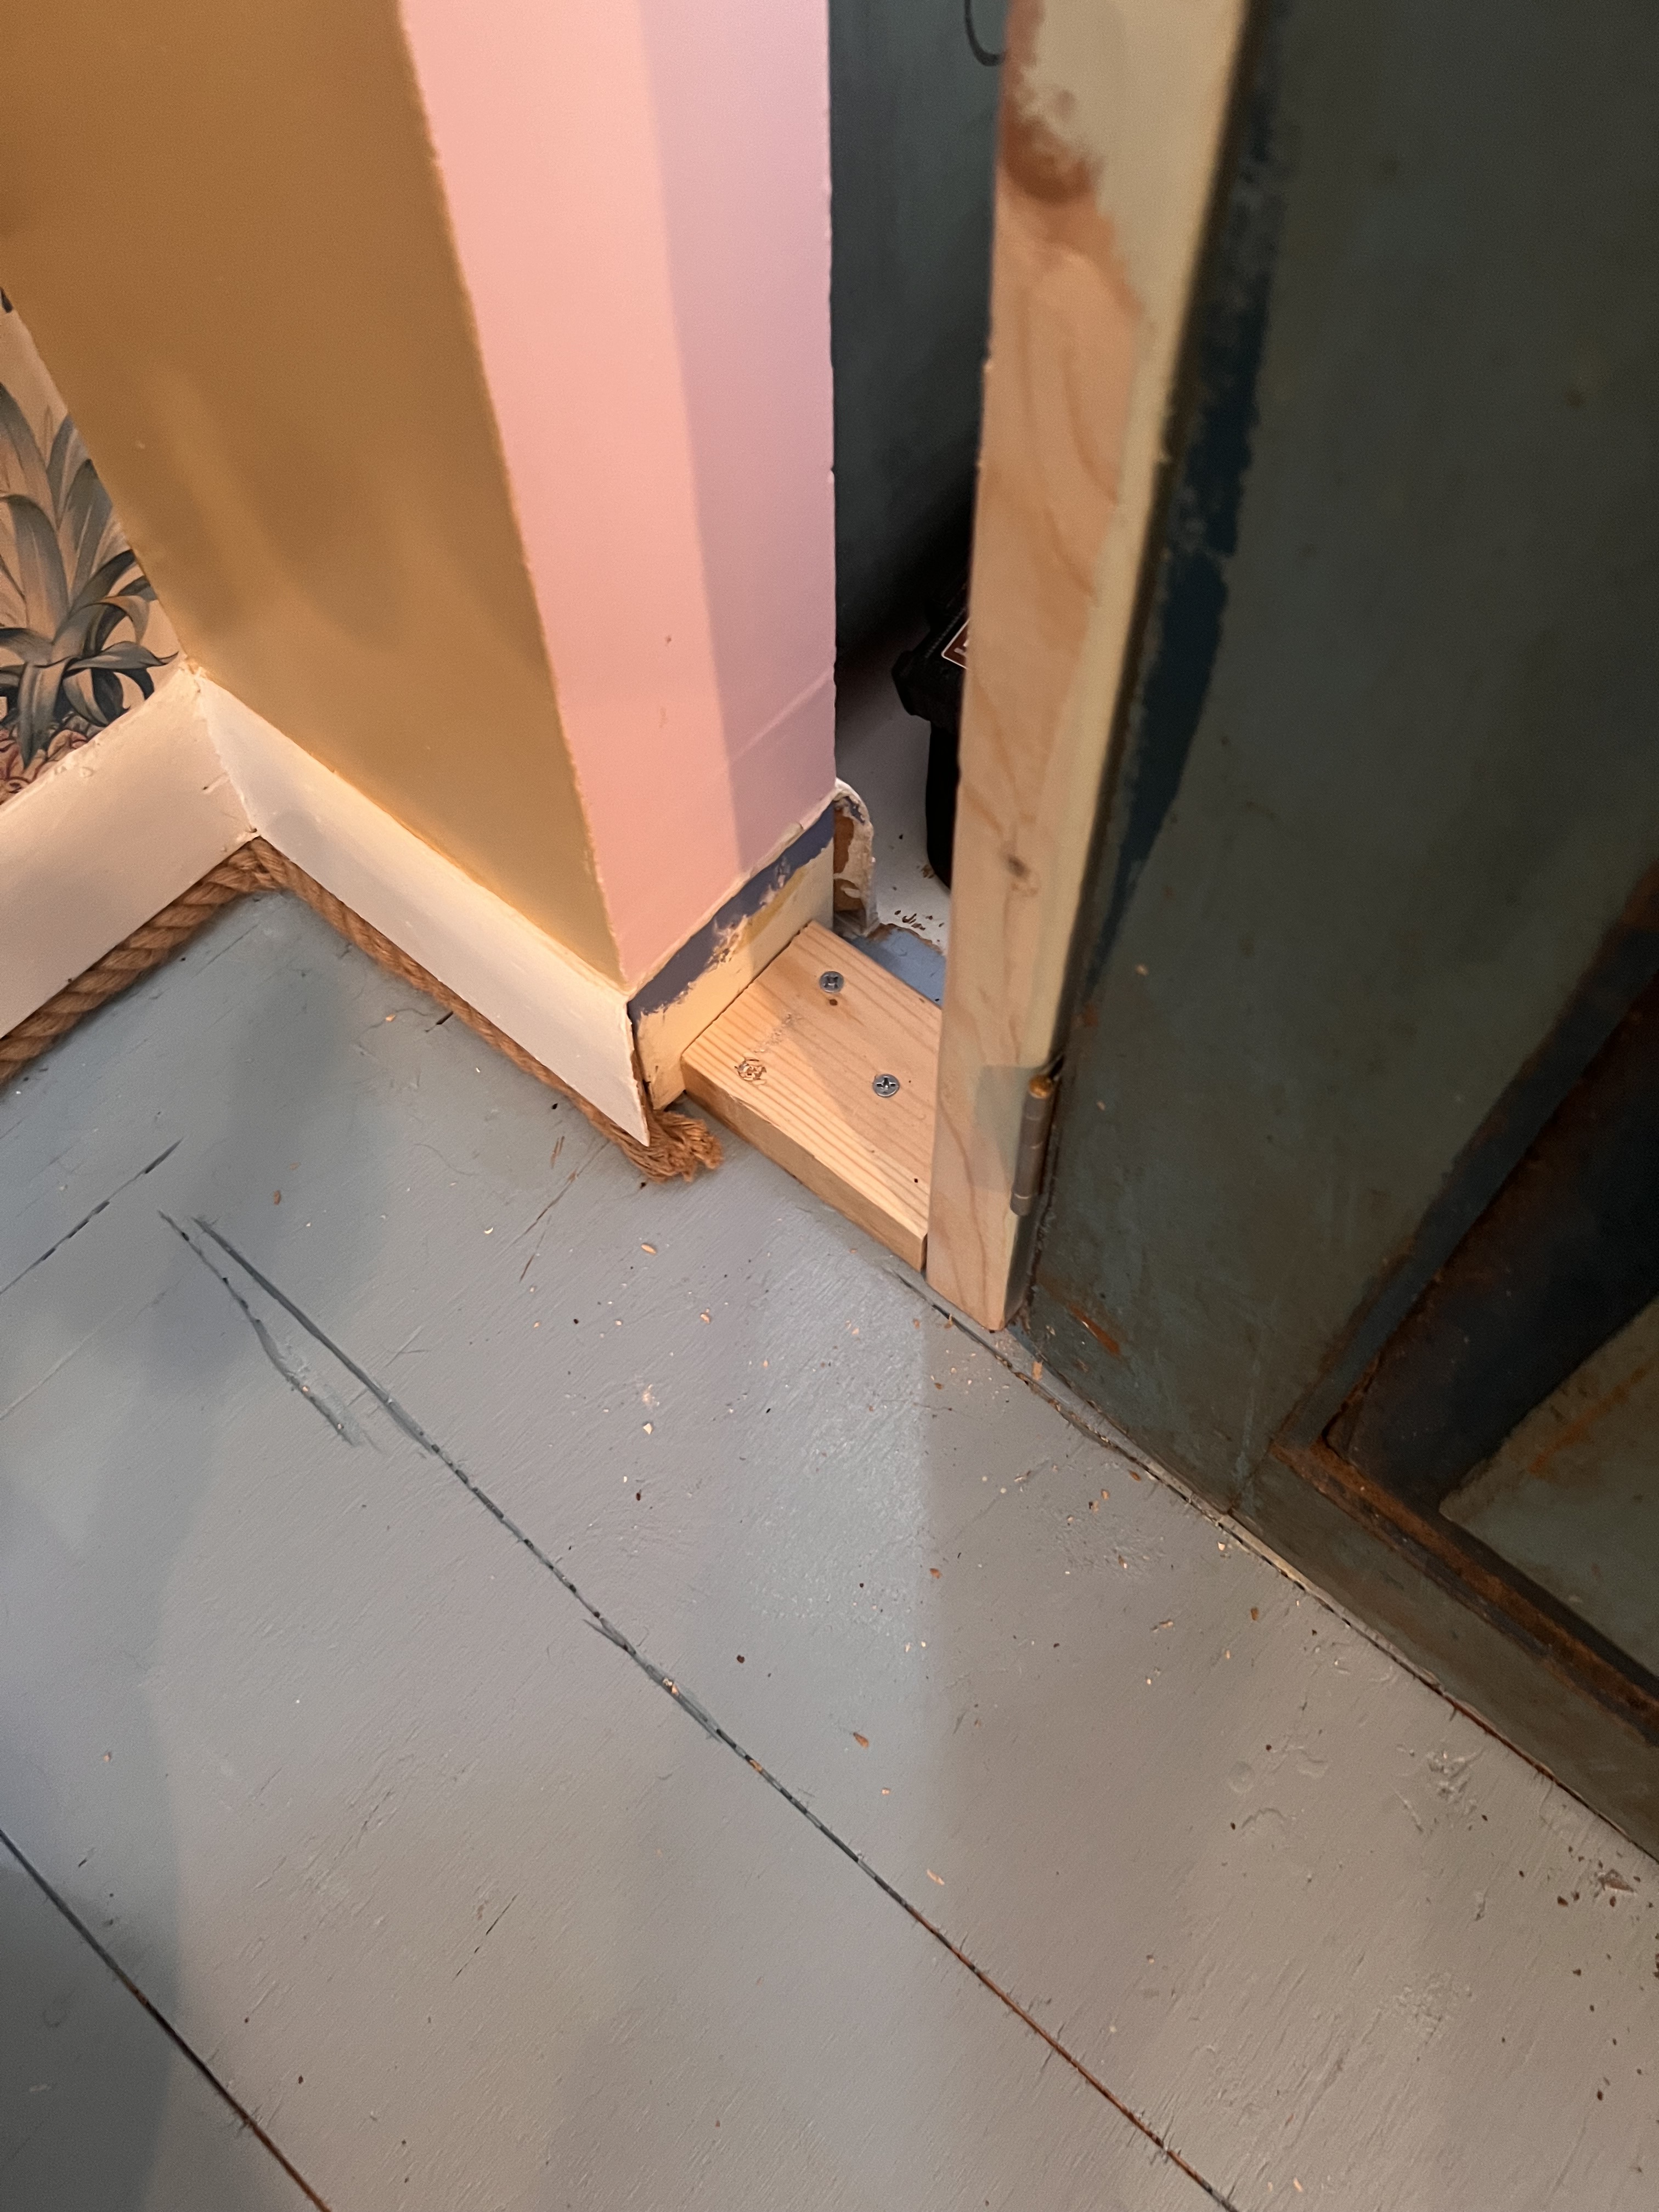
After installing both doors, I needed something to close the gap. I had saved the old base molding. Tip: Always save molding till a project is done. This will save you $ and time later. I had considered chicken wire, salvage-stained glass, but settled on simple 1x6s on either side, a 1×3 header, leftover 1″ molding I had lying around from another project and jute to be consistent with look of all of the rope molding I had created in the bedroom. Tip: I use all the same trim paint (pure white) in my house to keep things consistent and to make it easy to go from room by room with projects. The 2x4s and rope molding was painted in an egg blue, but everything else, pure white.
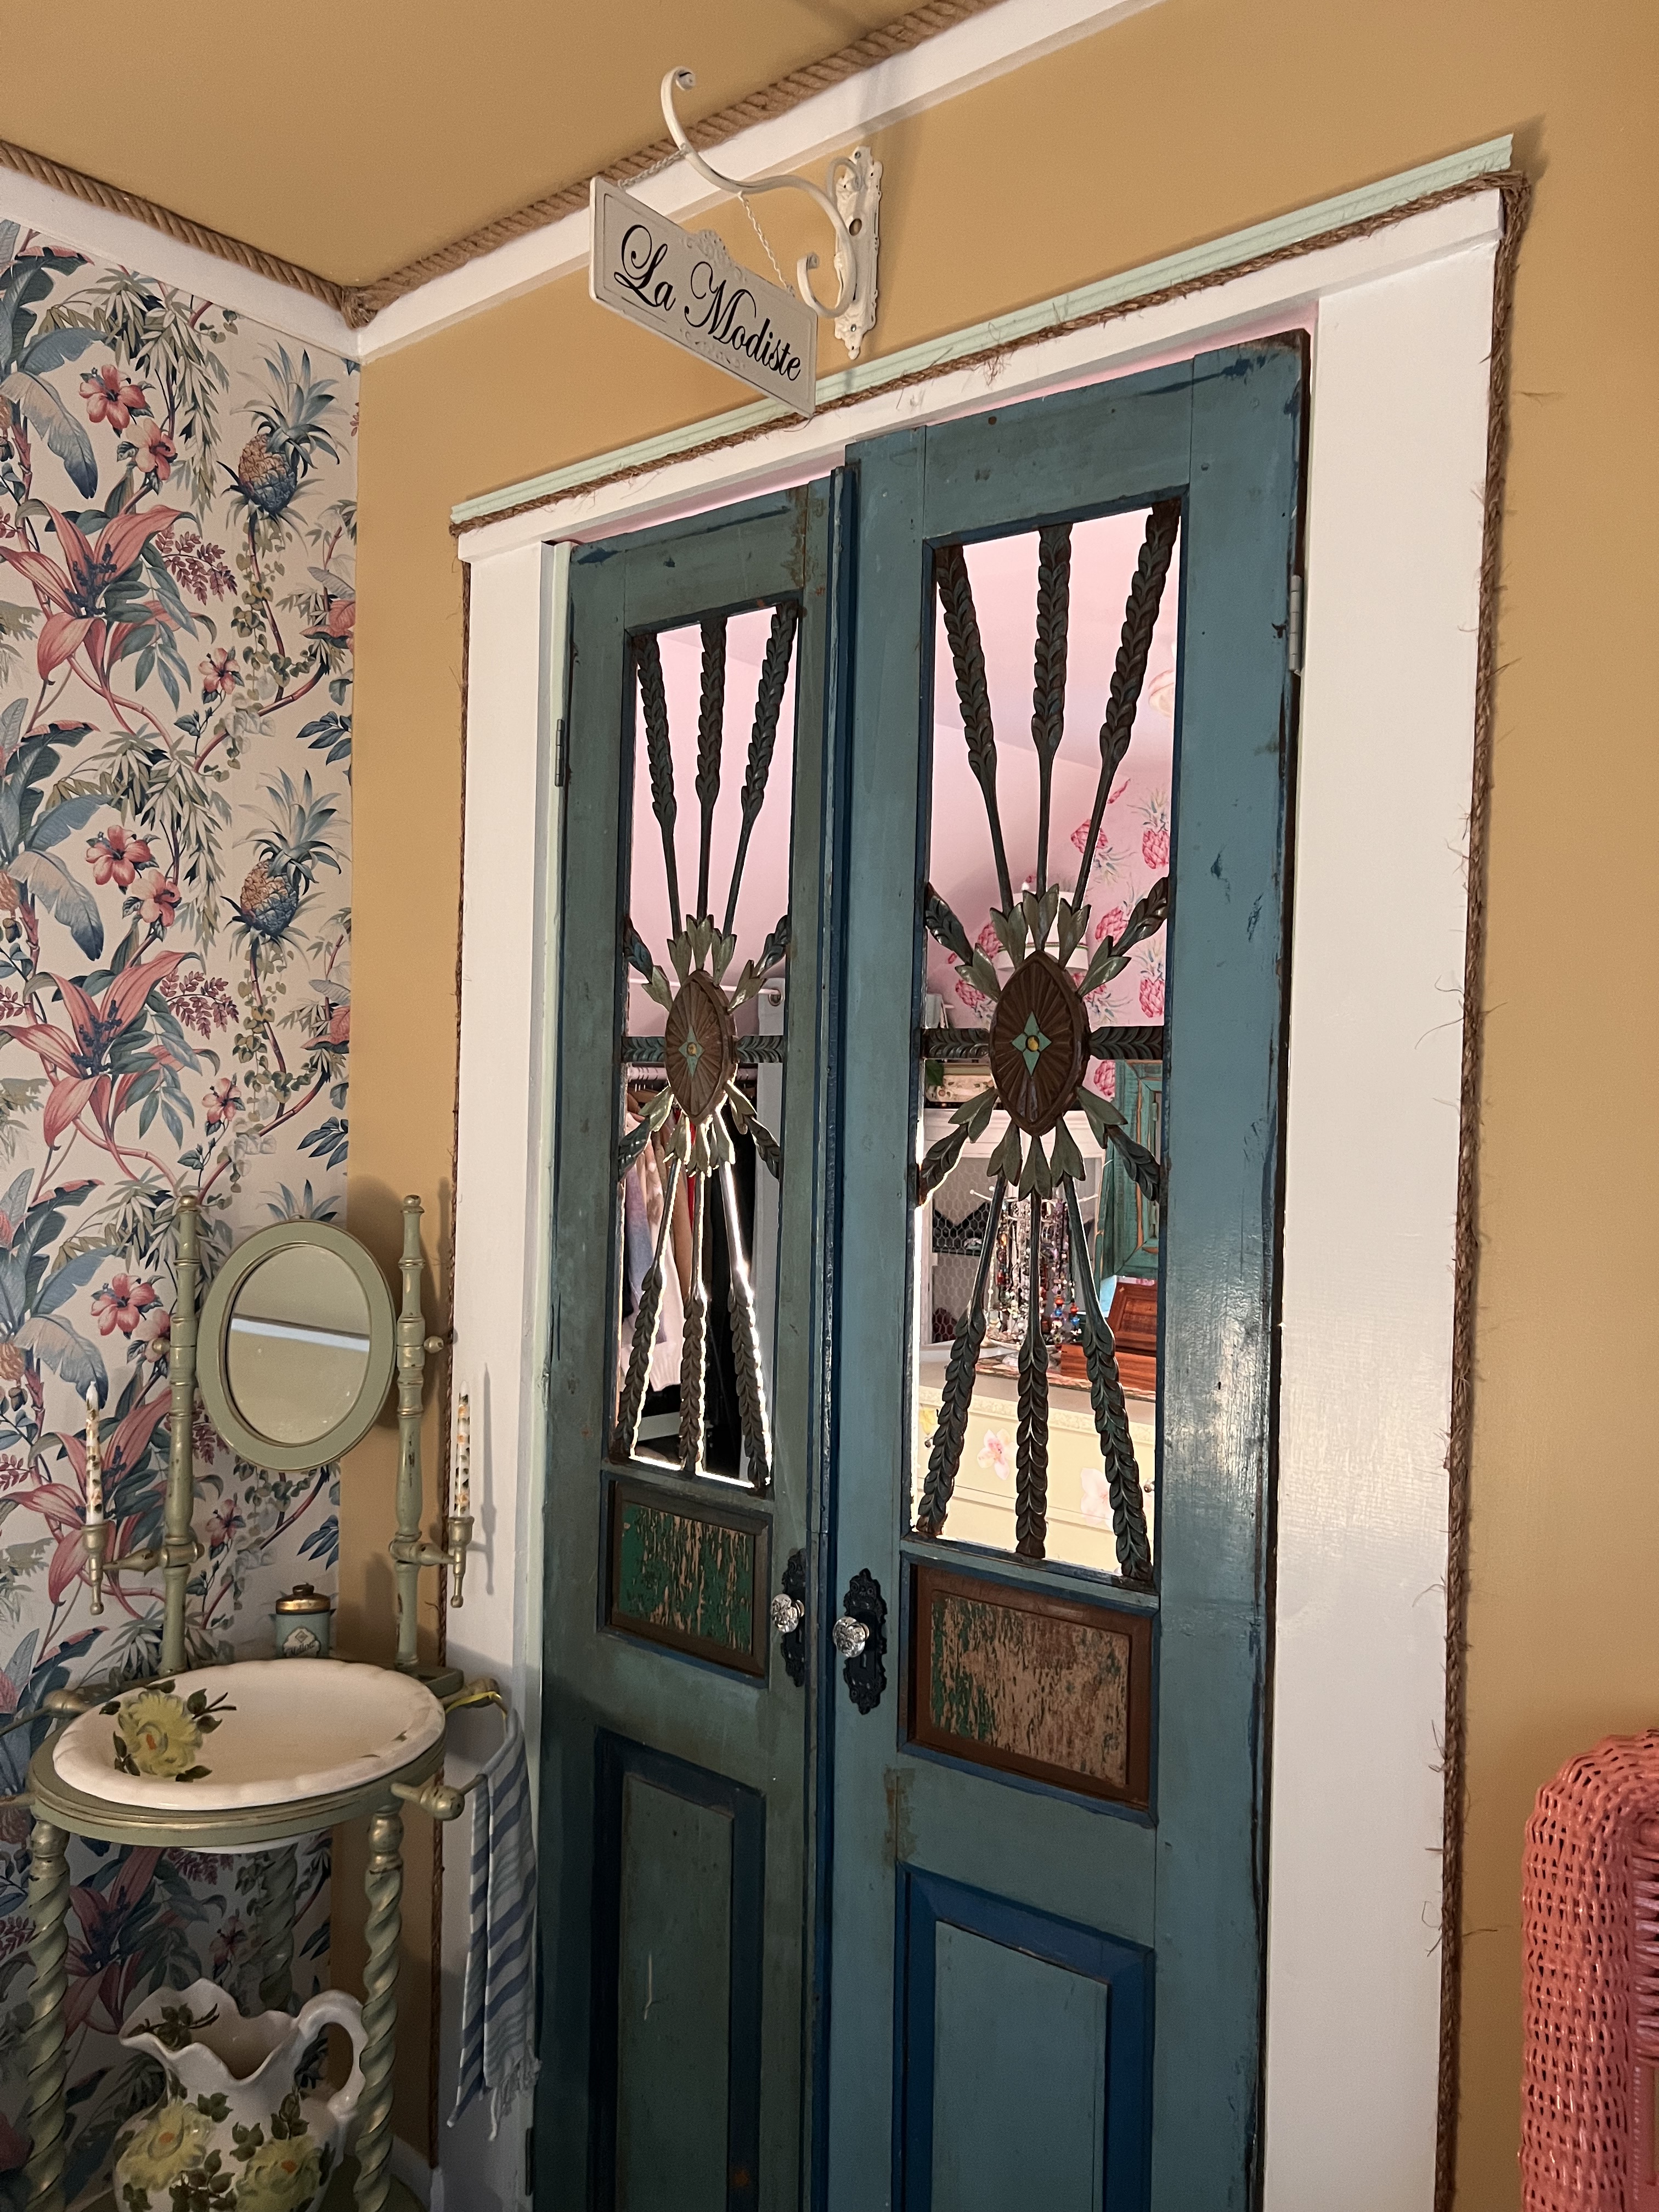
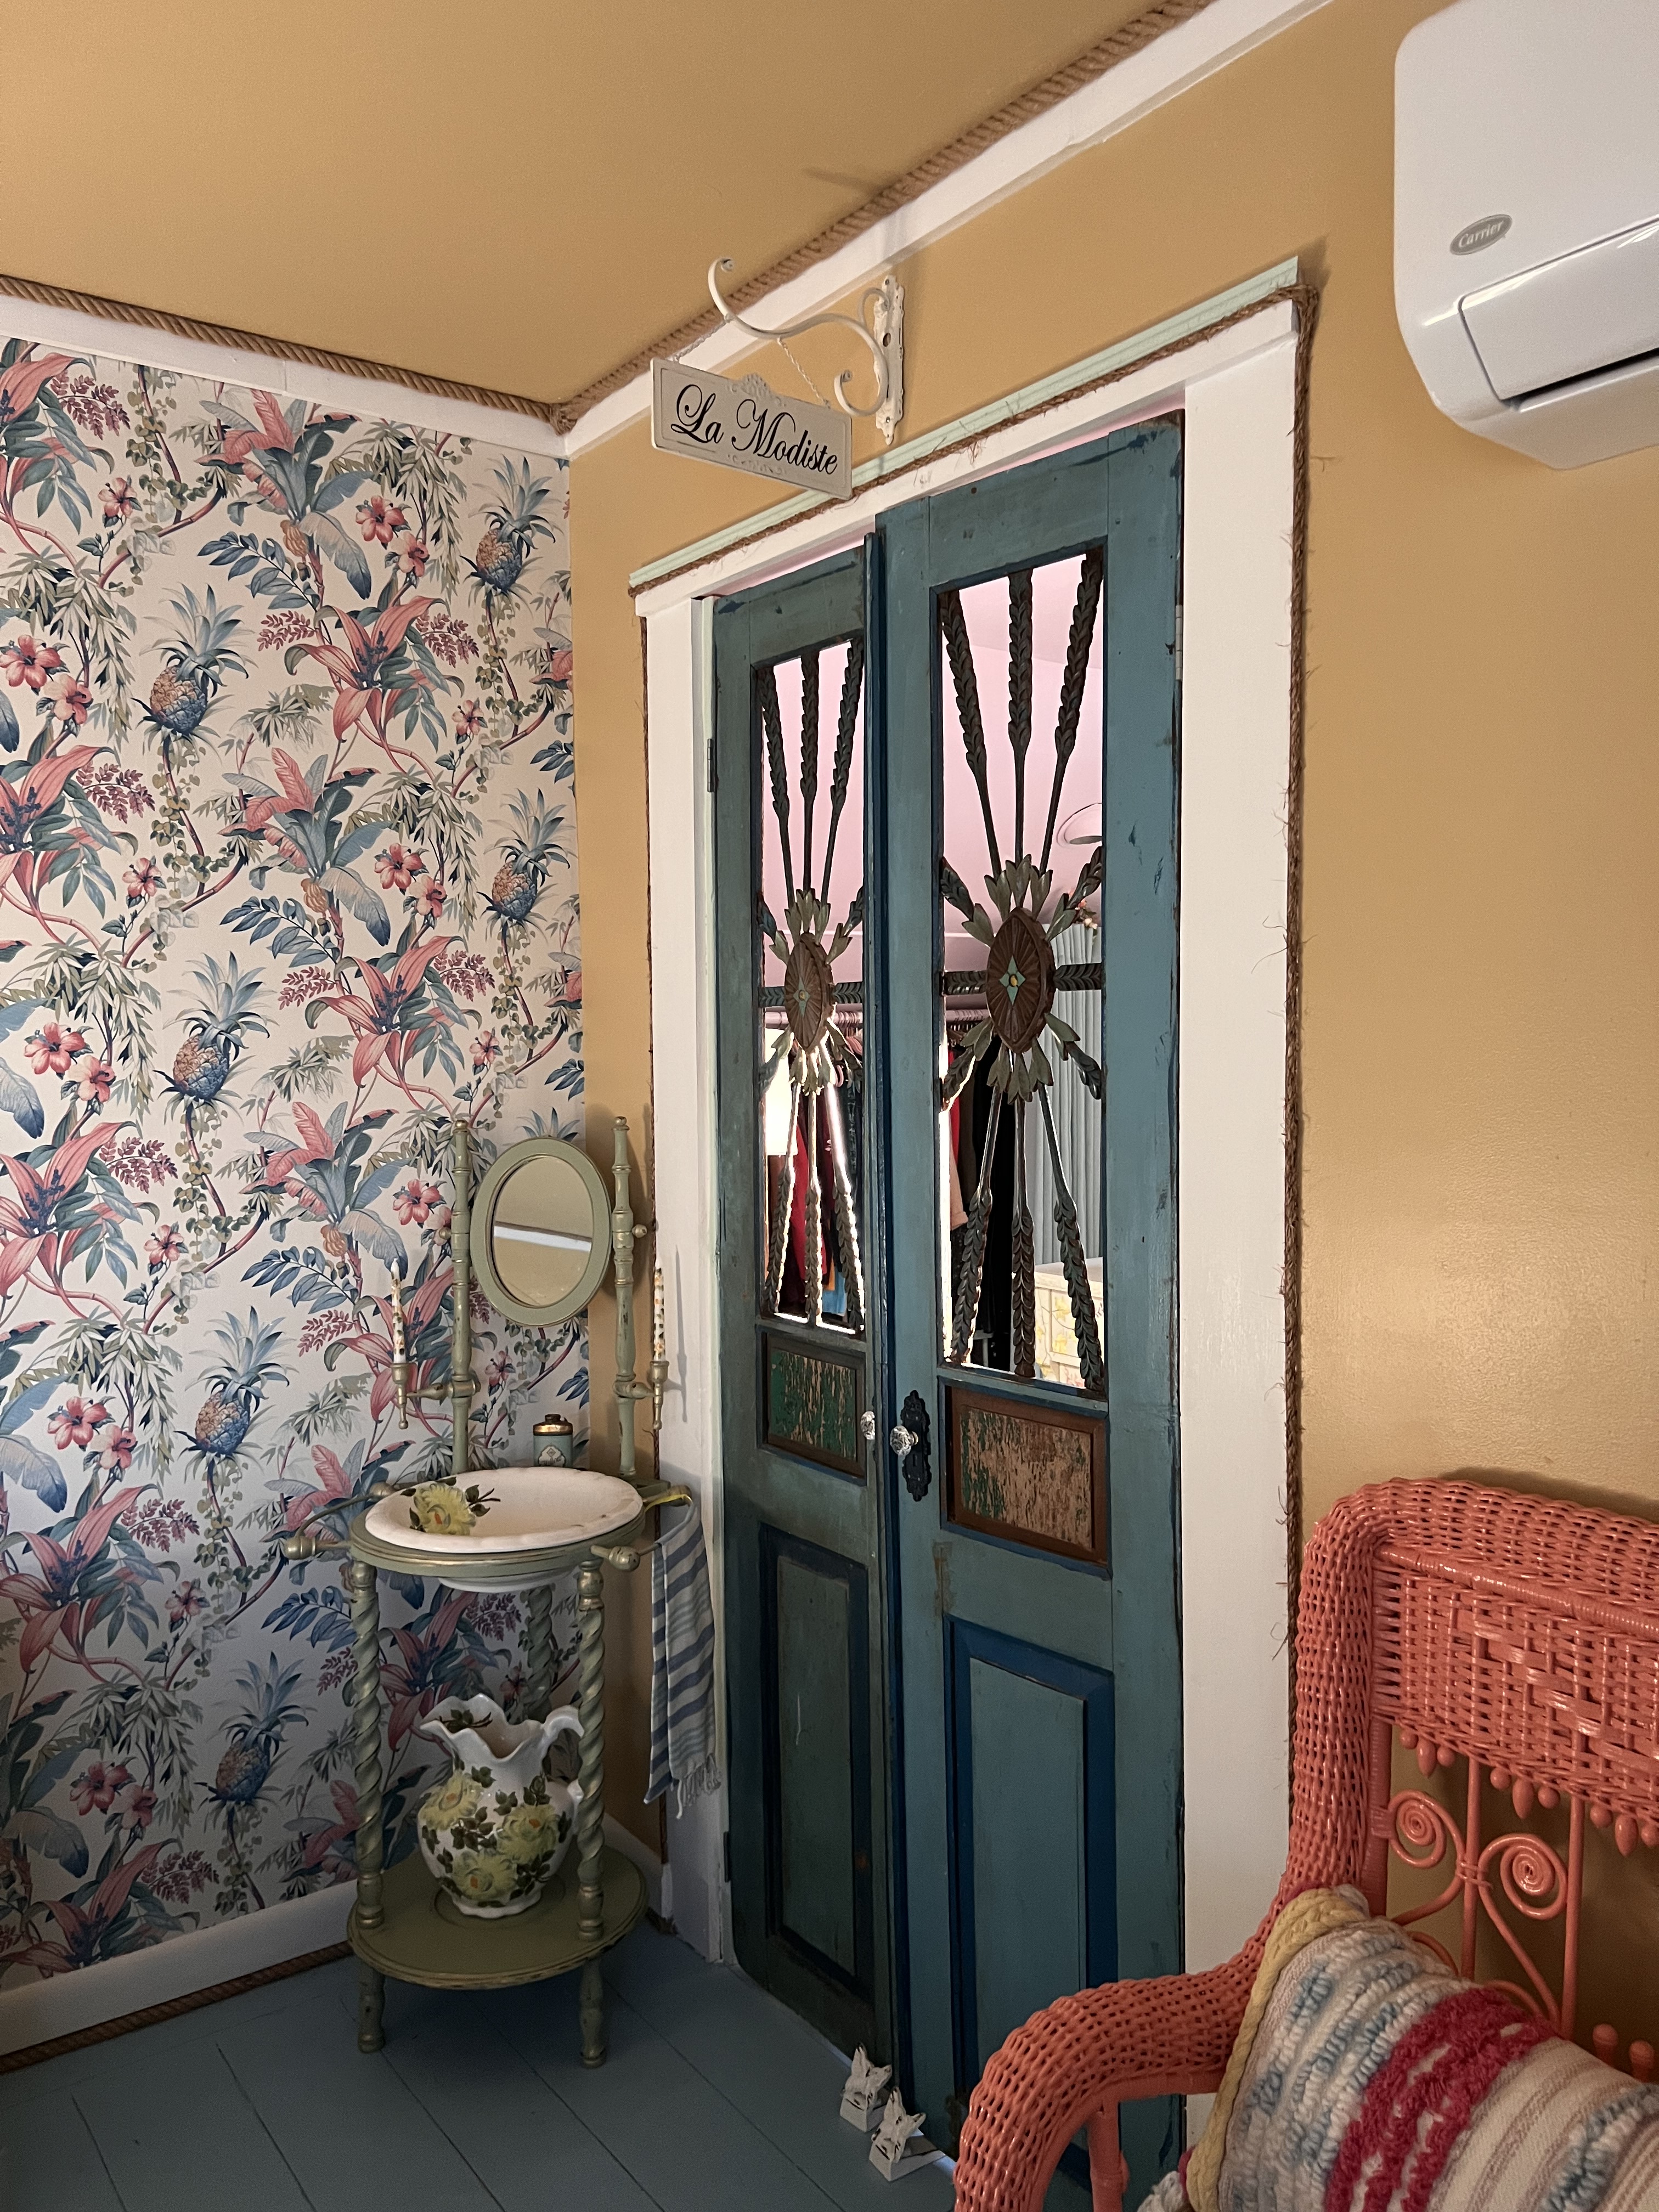
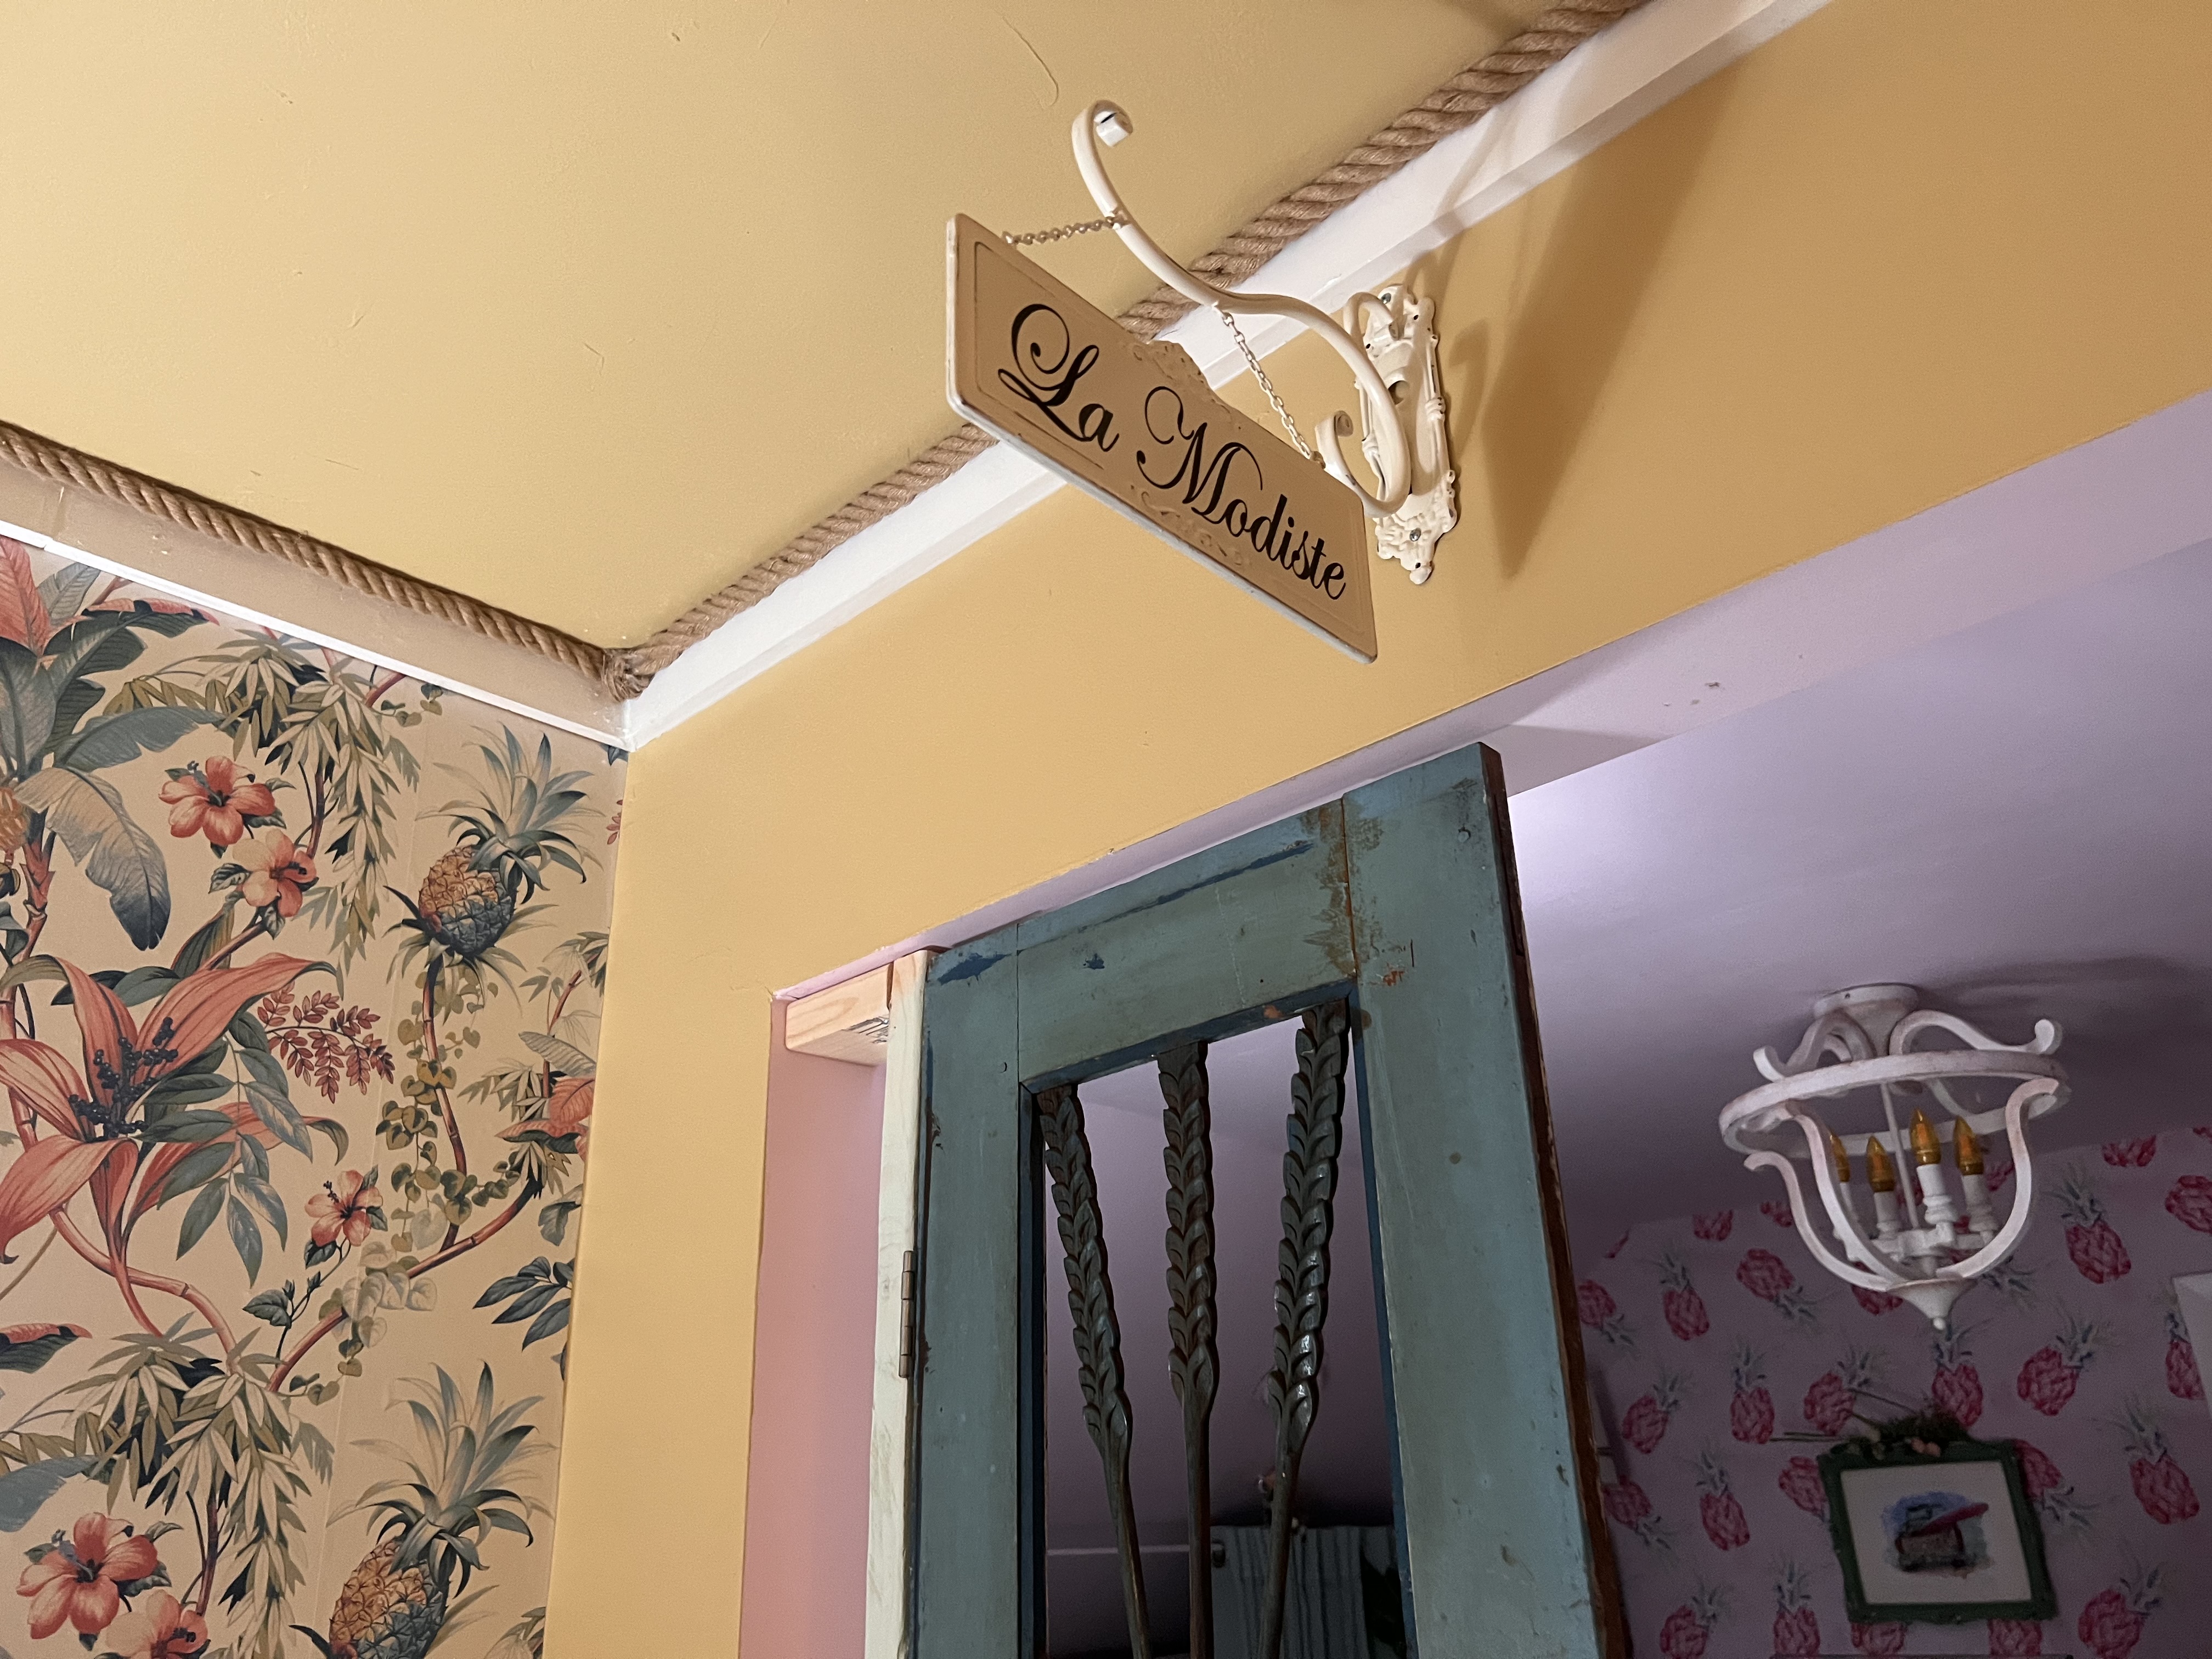
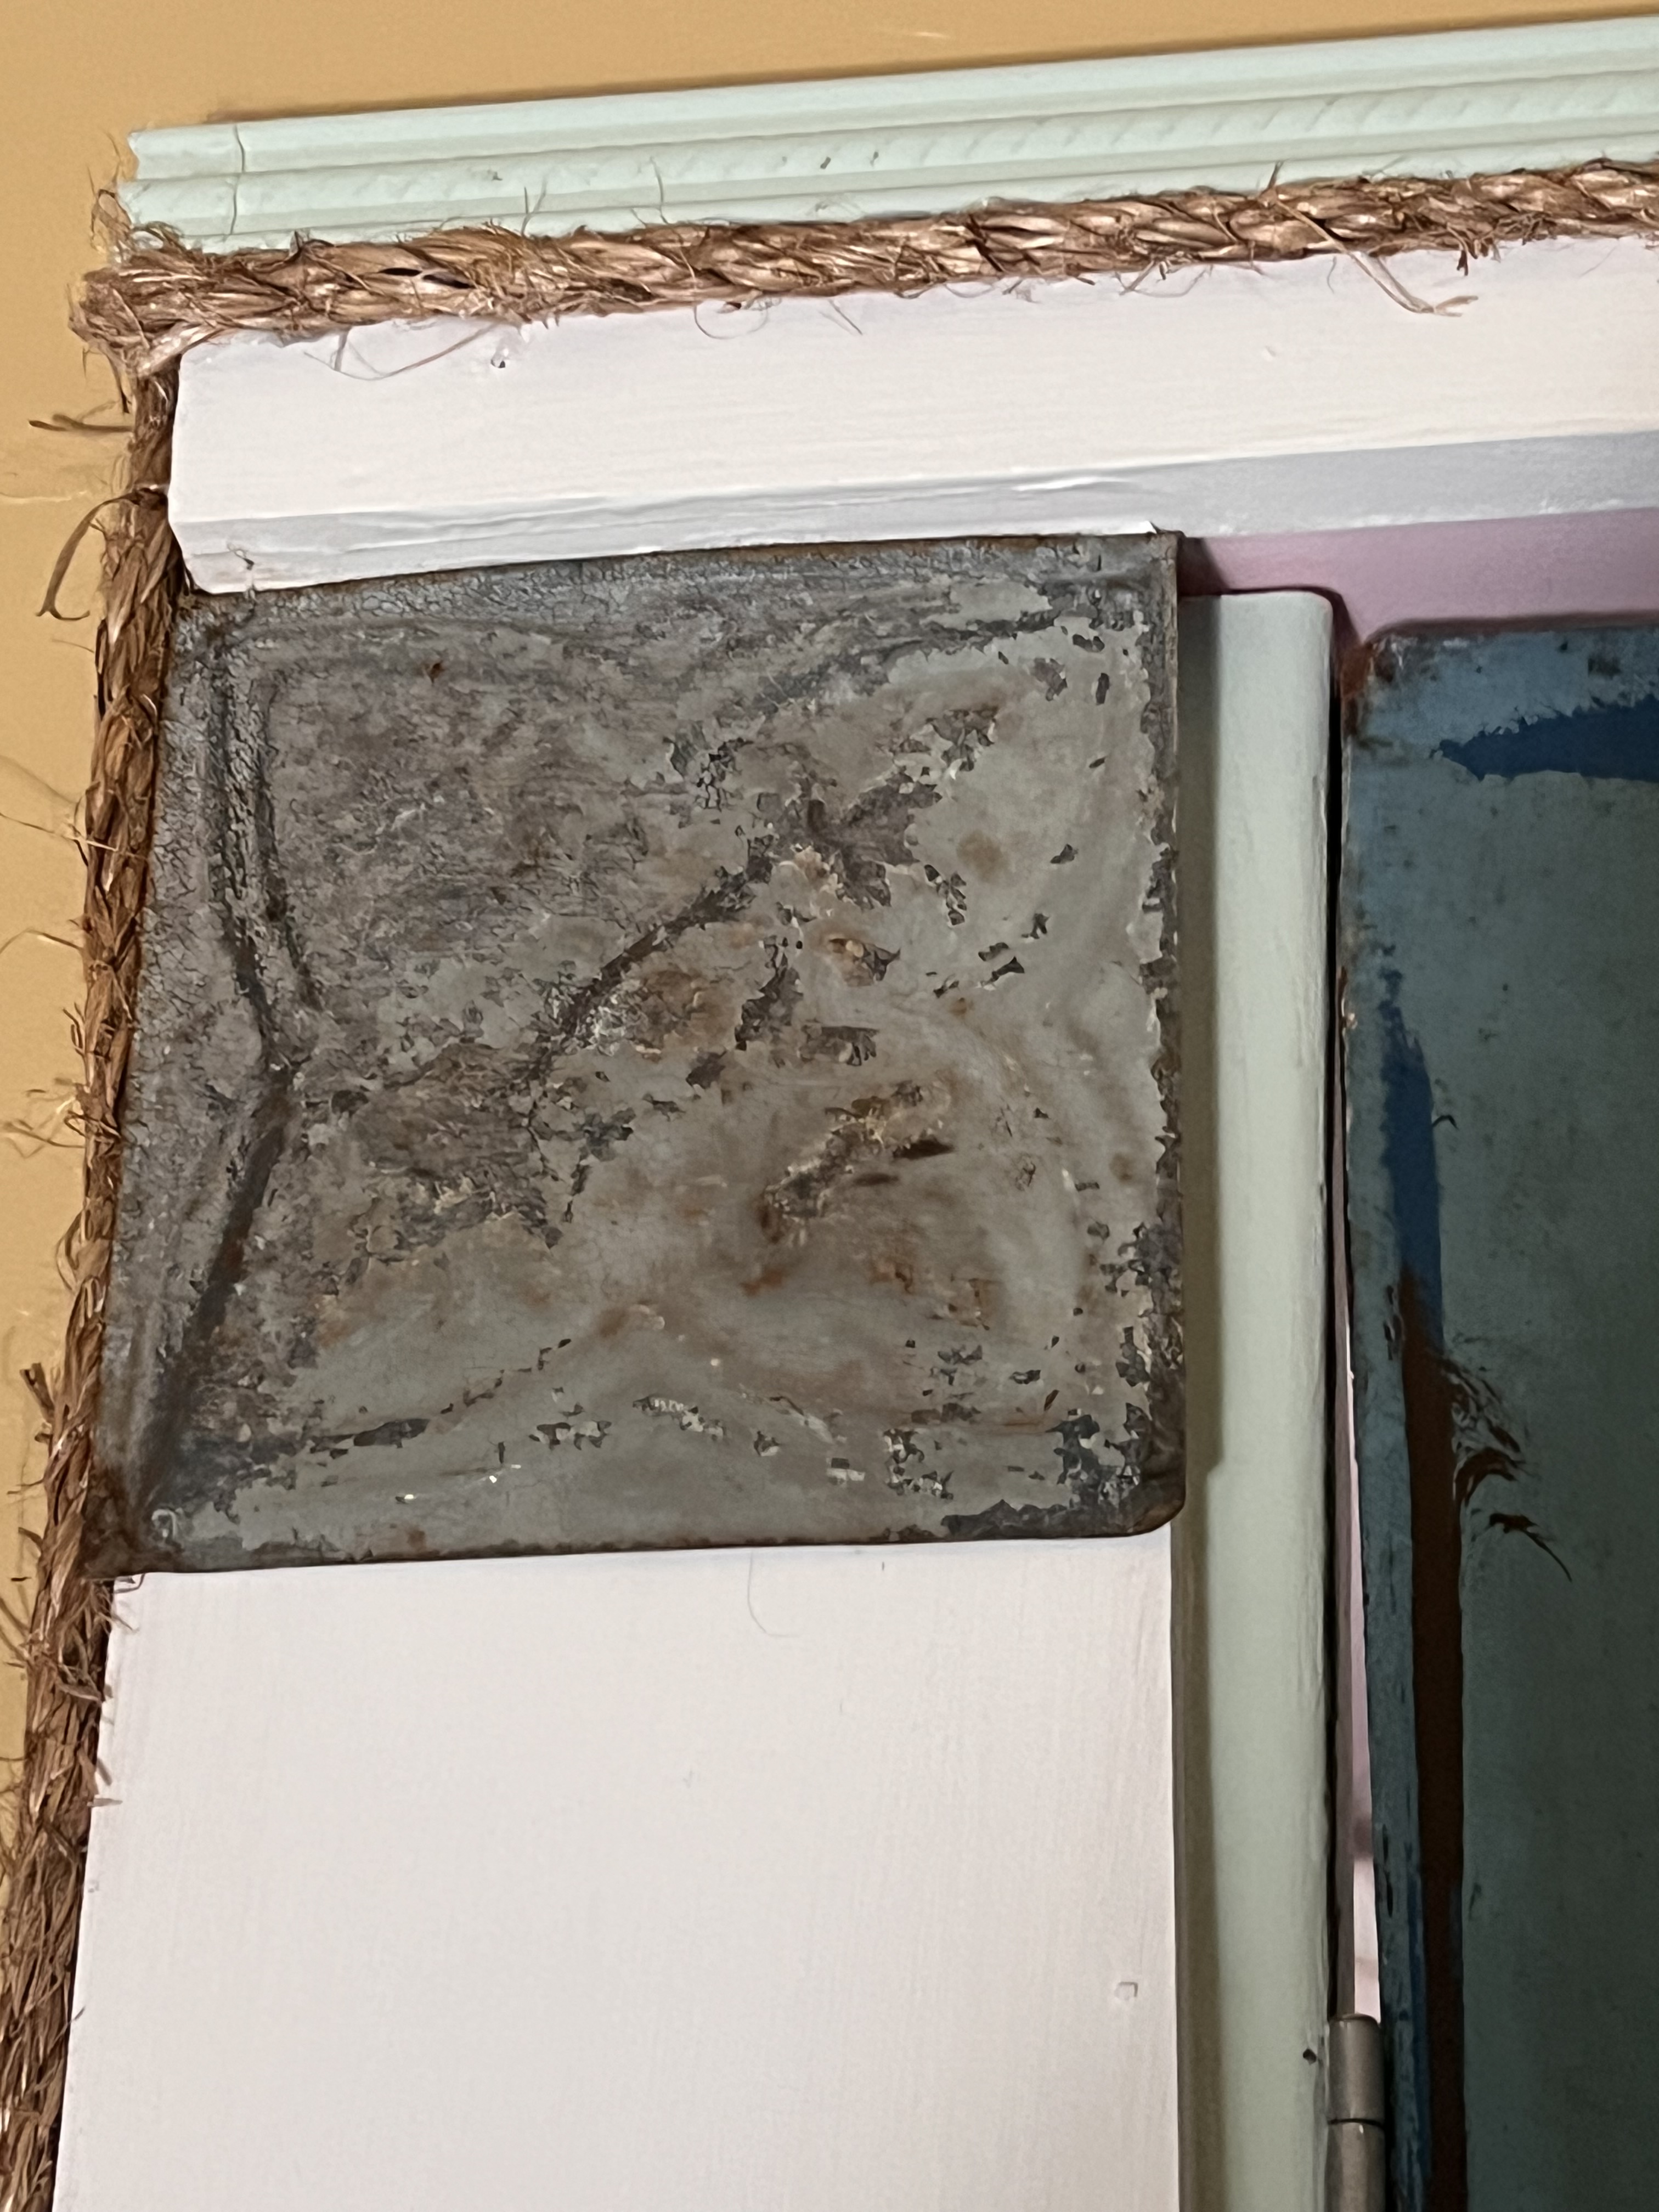
Later, I found some cool vintage ceiling tiles for a few dollars I added as well to the door trim for fun.

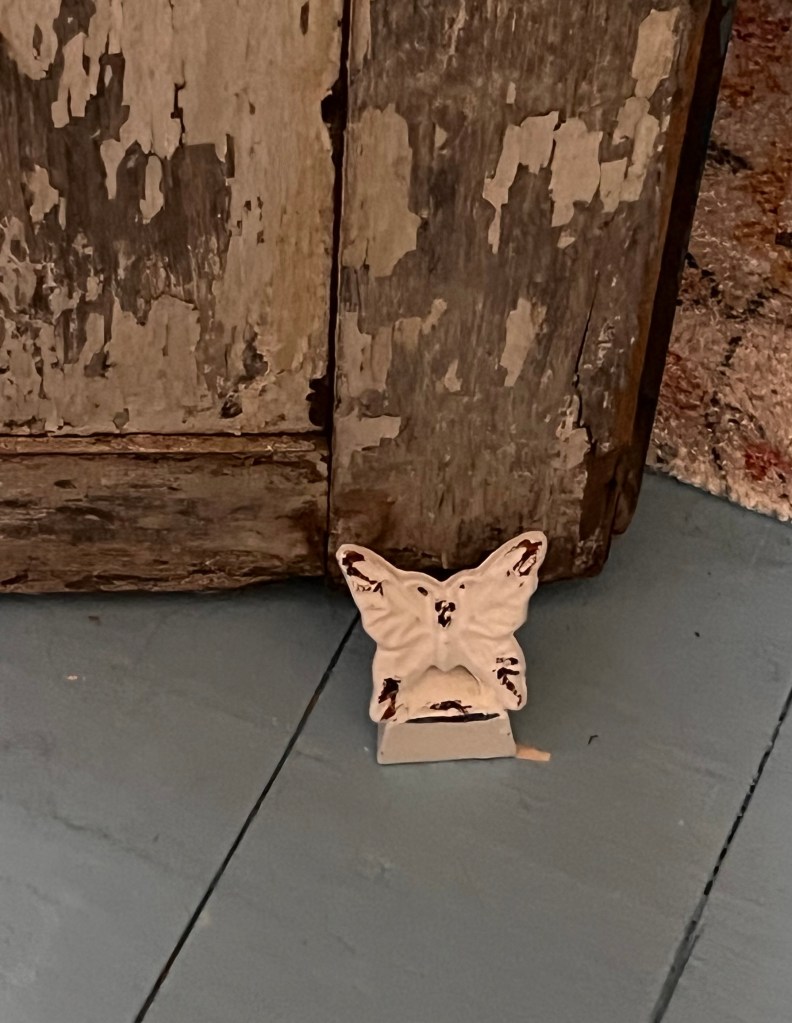
I want one door to remain open at all times just for my ease of access to the closet and show the age of the doors. The butterfly doorstops can be found on Amazon.

To complete the doors, I added some vintage looking navy blue and glass dummy doorknobs. The distressed closet handles can be found on Amazon.
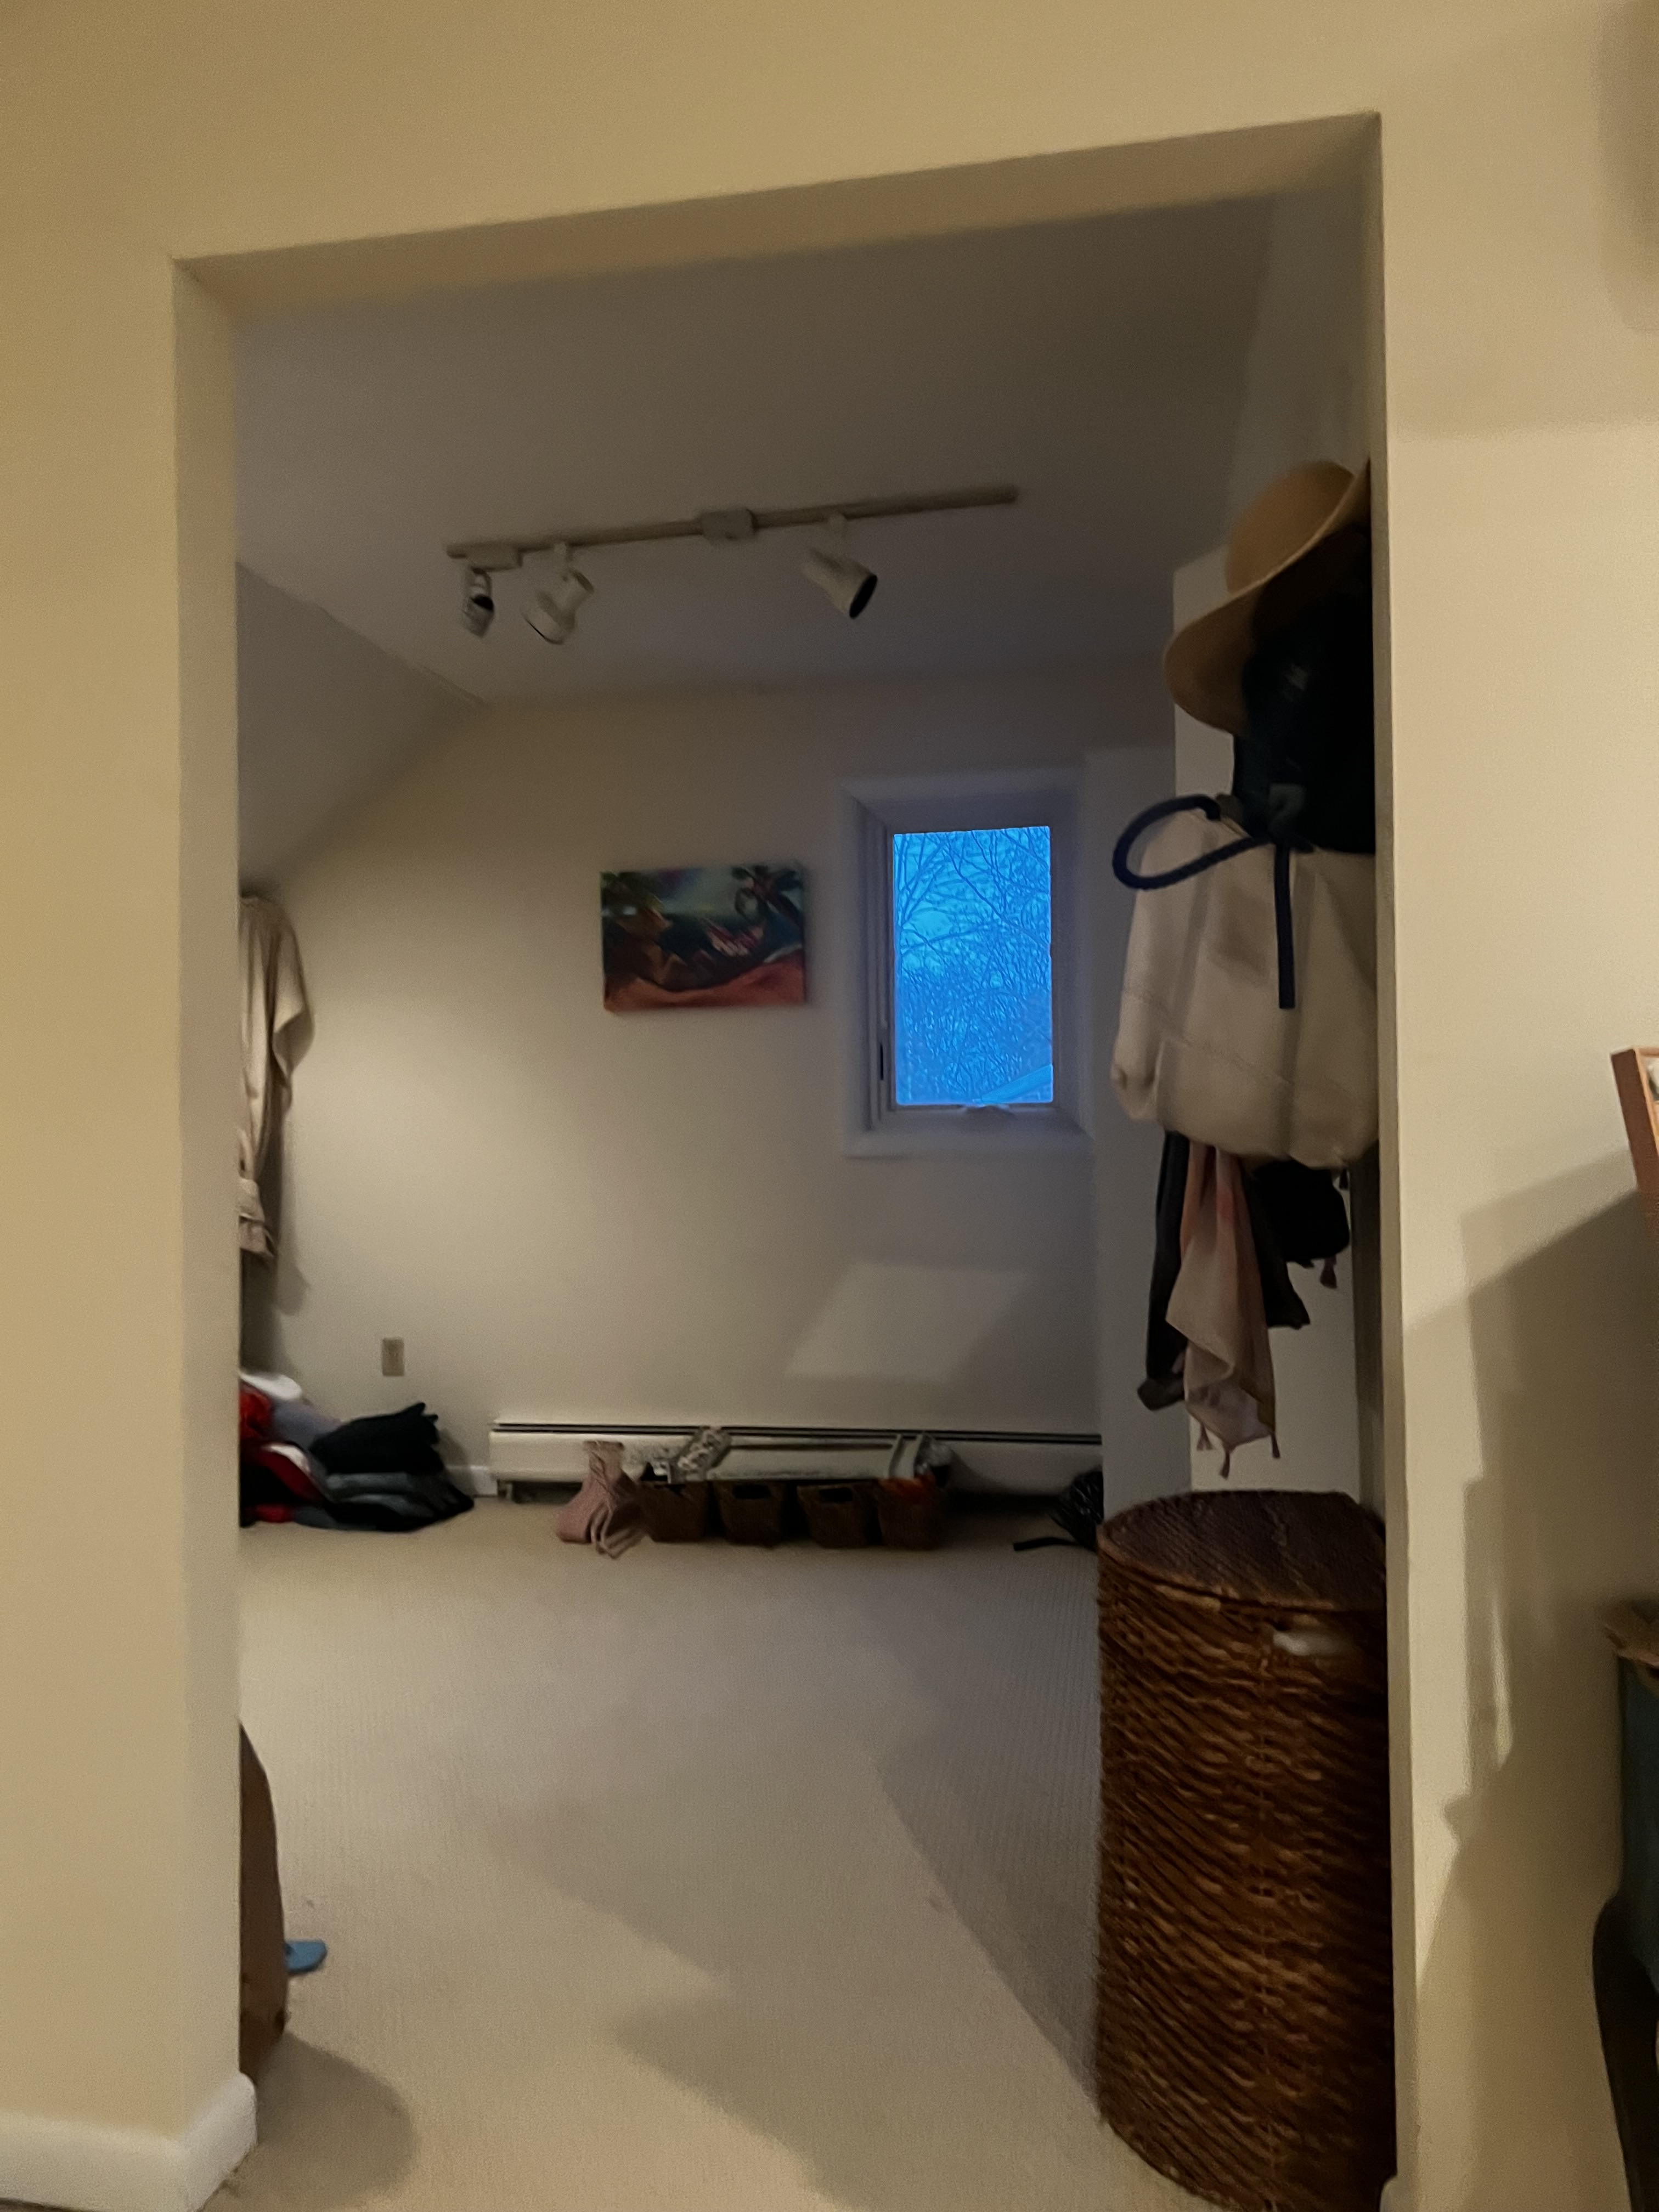
Finishing the Other Side
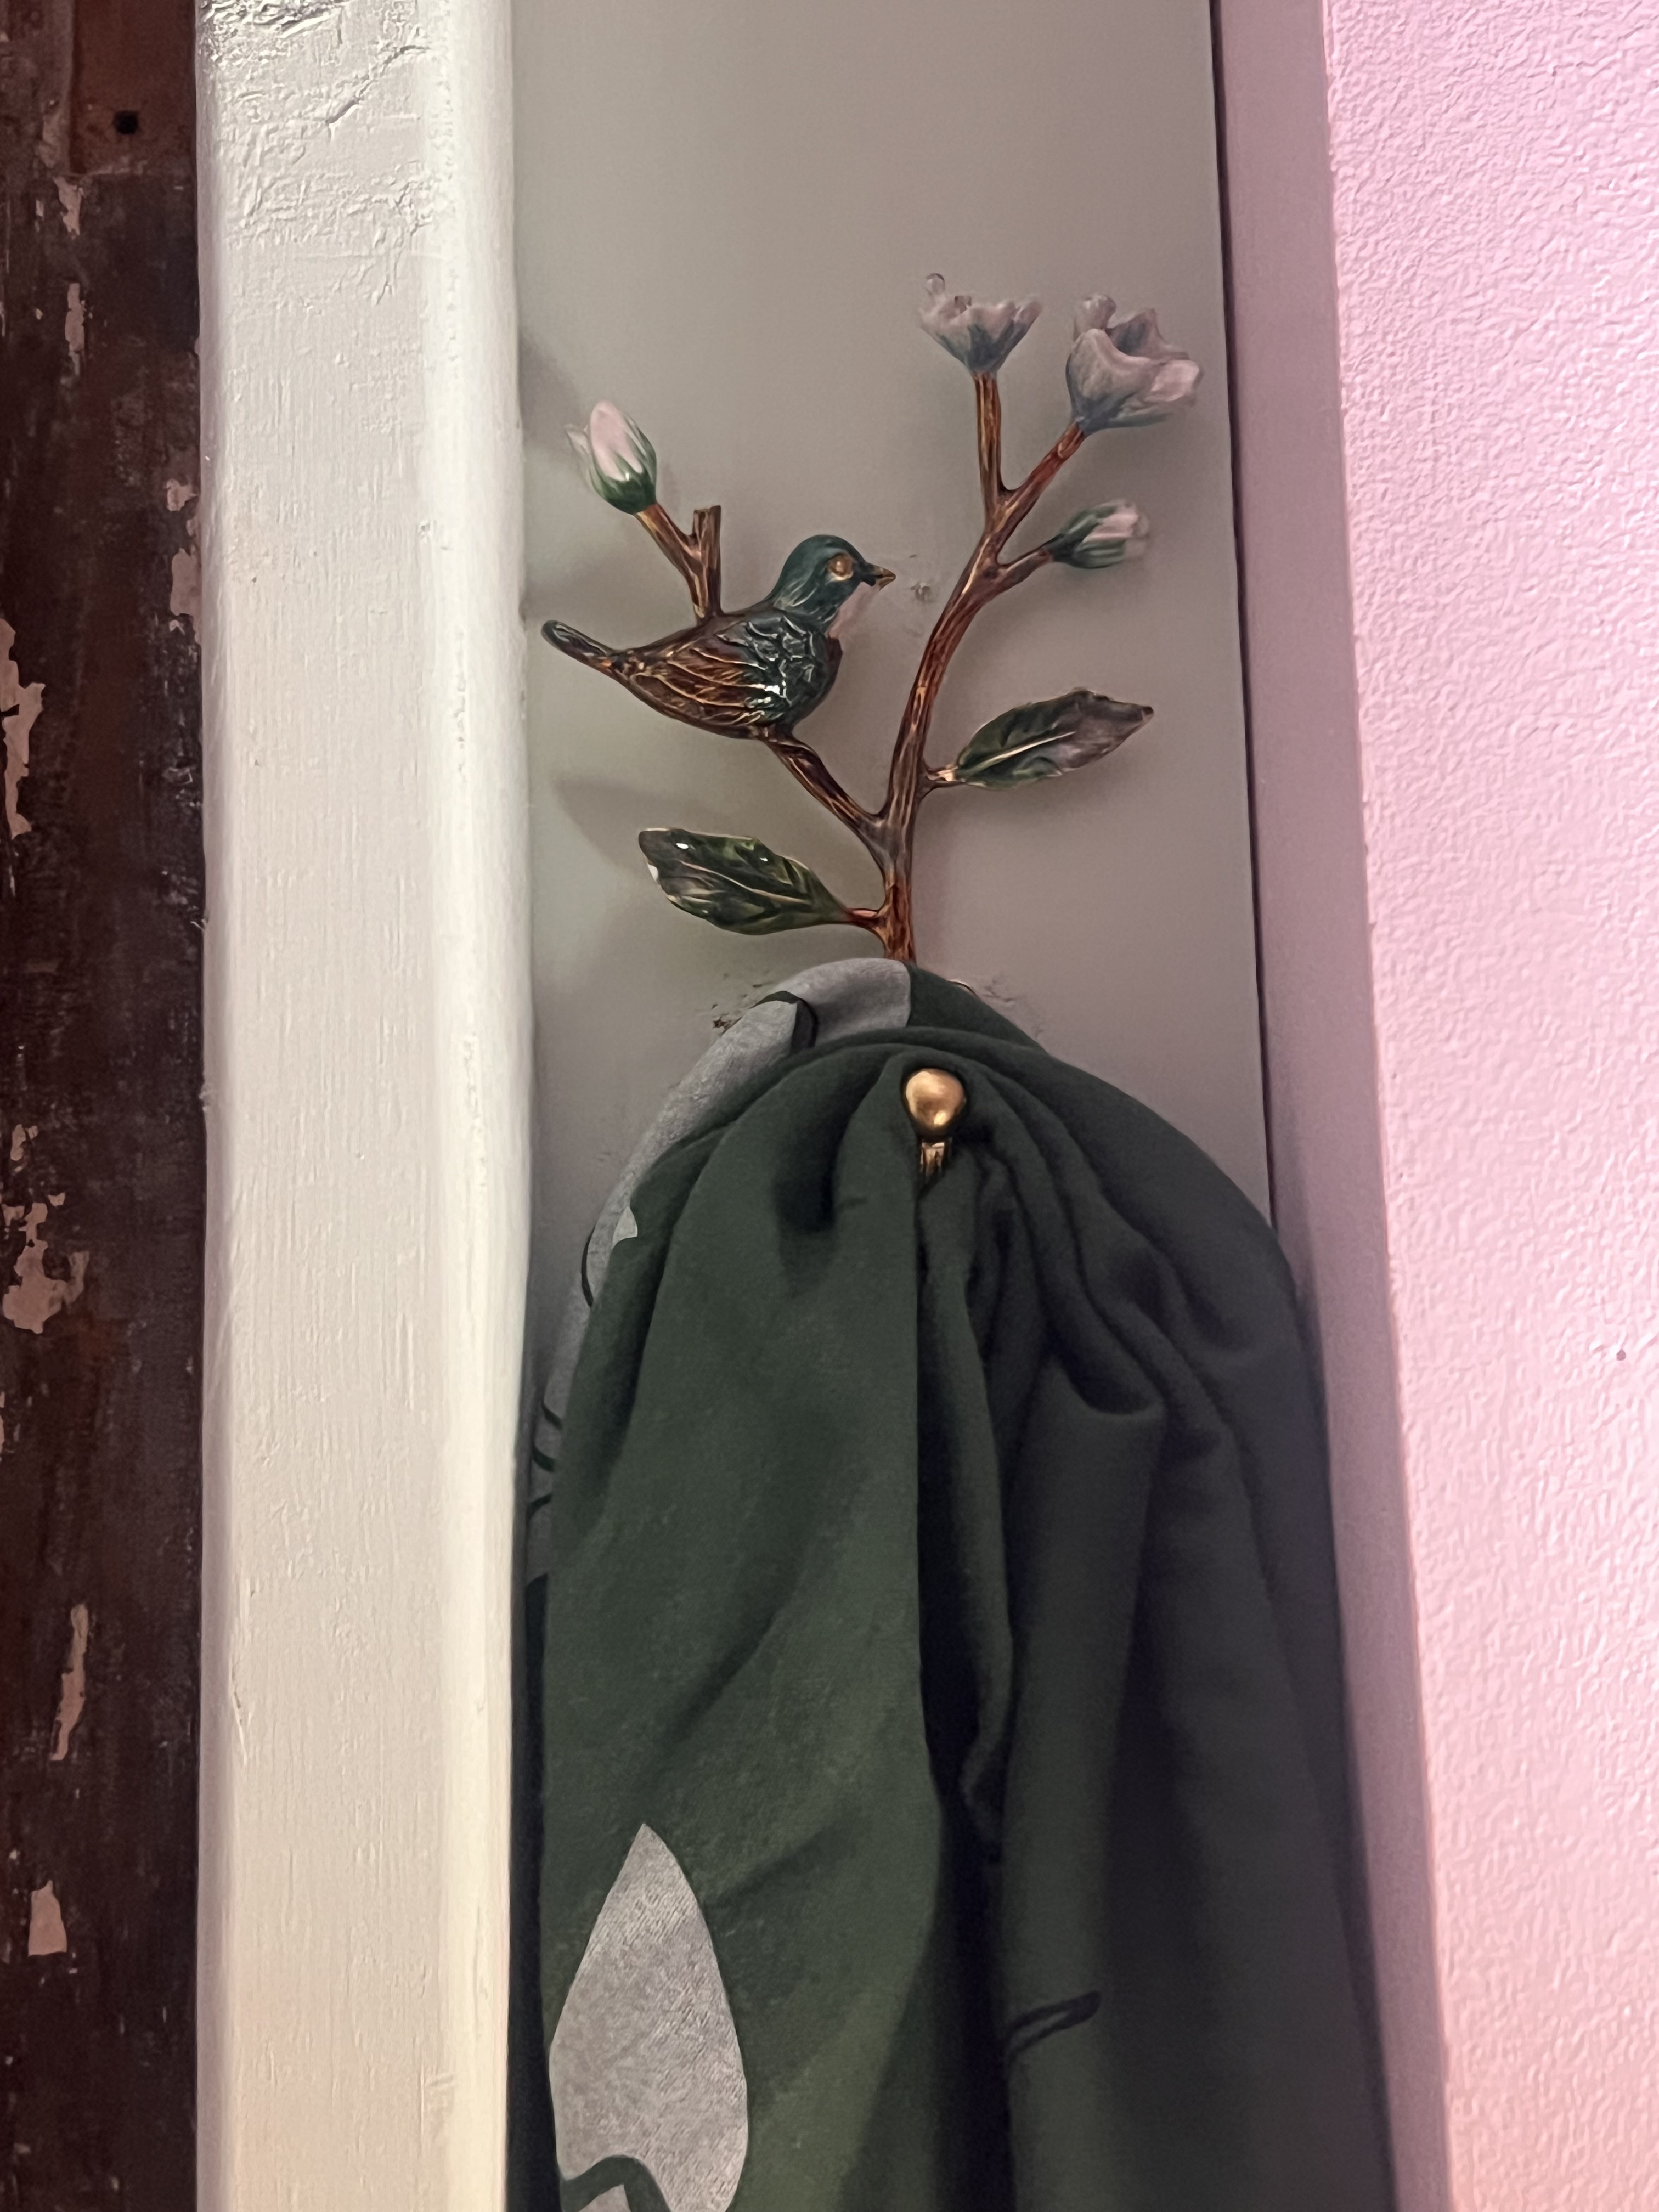
I am not going for a factory finish here and love things that are cute and functional. The space was narrow, but perfect for hanging belts and scarfs. I could have finished with the 1×6 molding, but what a waste of space. I decided to paint off the 2x4s in egg blue, use my scrap molding from the original wall and hang 4 adorable hooks. These are sold in pairs so I could mimic on each side. I opted for birds and roses, but you really could do anything you like here. You can find the vintage bird hooks and vintage rose hooks on Amazon. Tip: I had to use shorter screws to avoid them going through to the other side of the molding. If doing something like this, make sure to check the length of your screws!

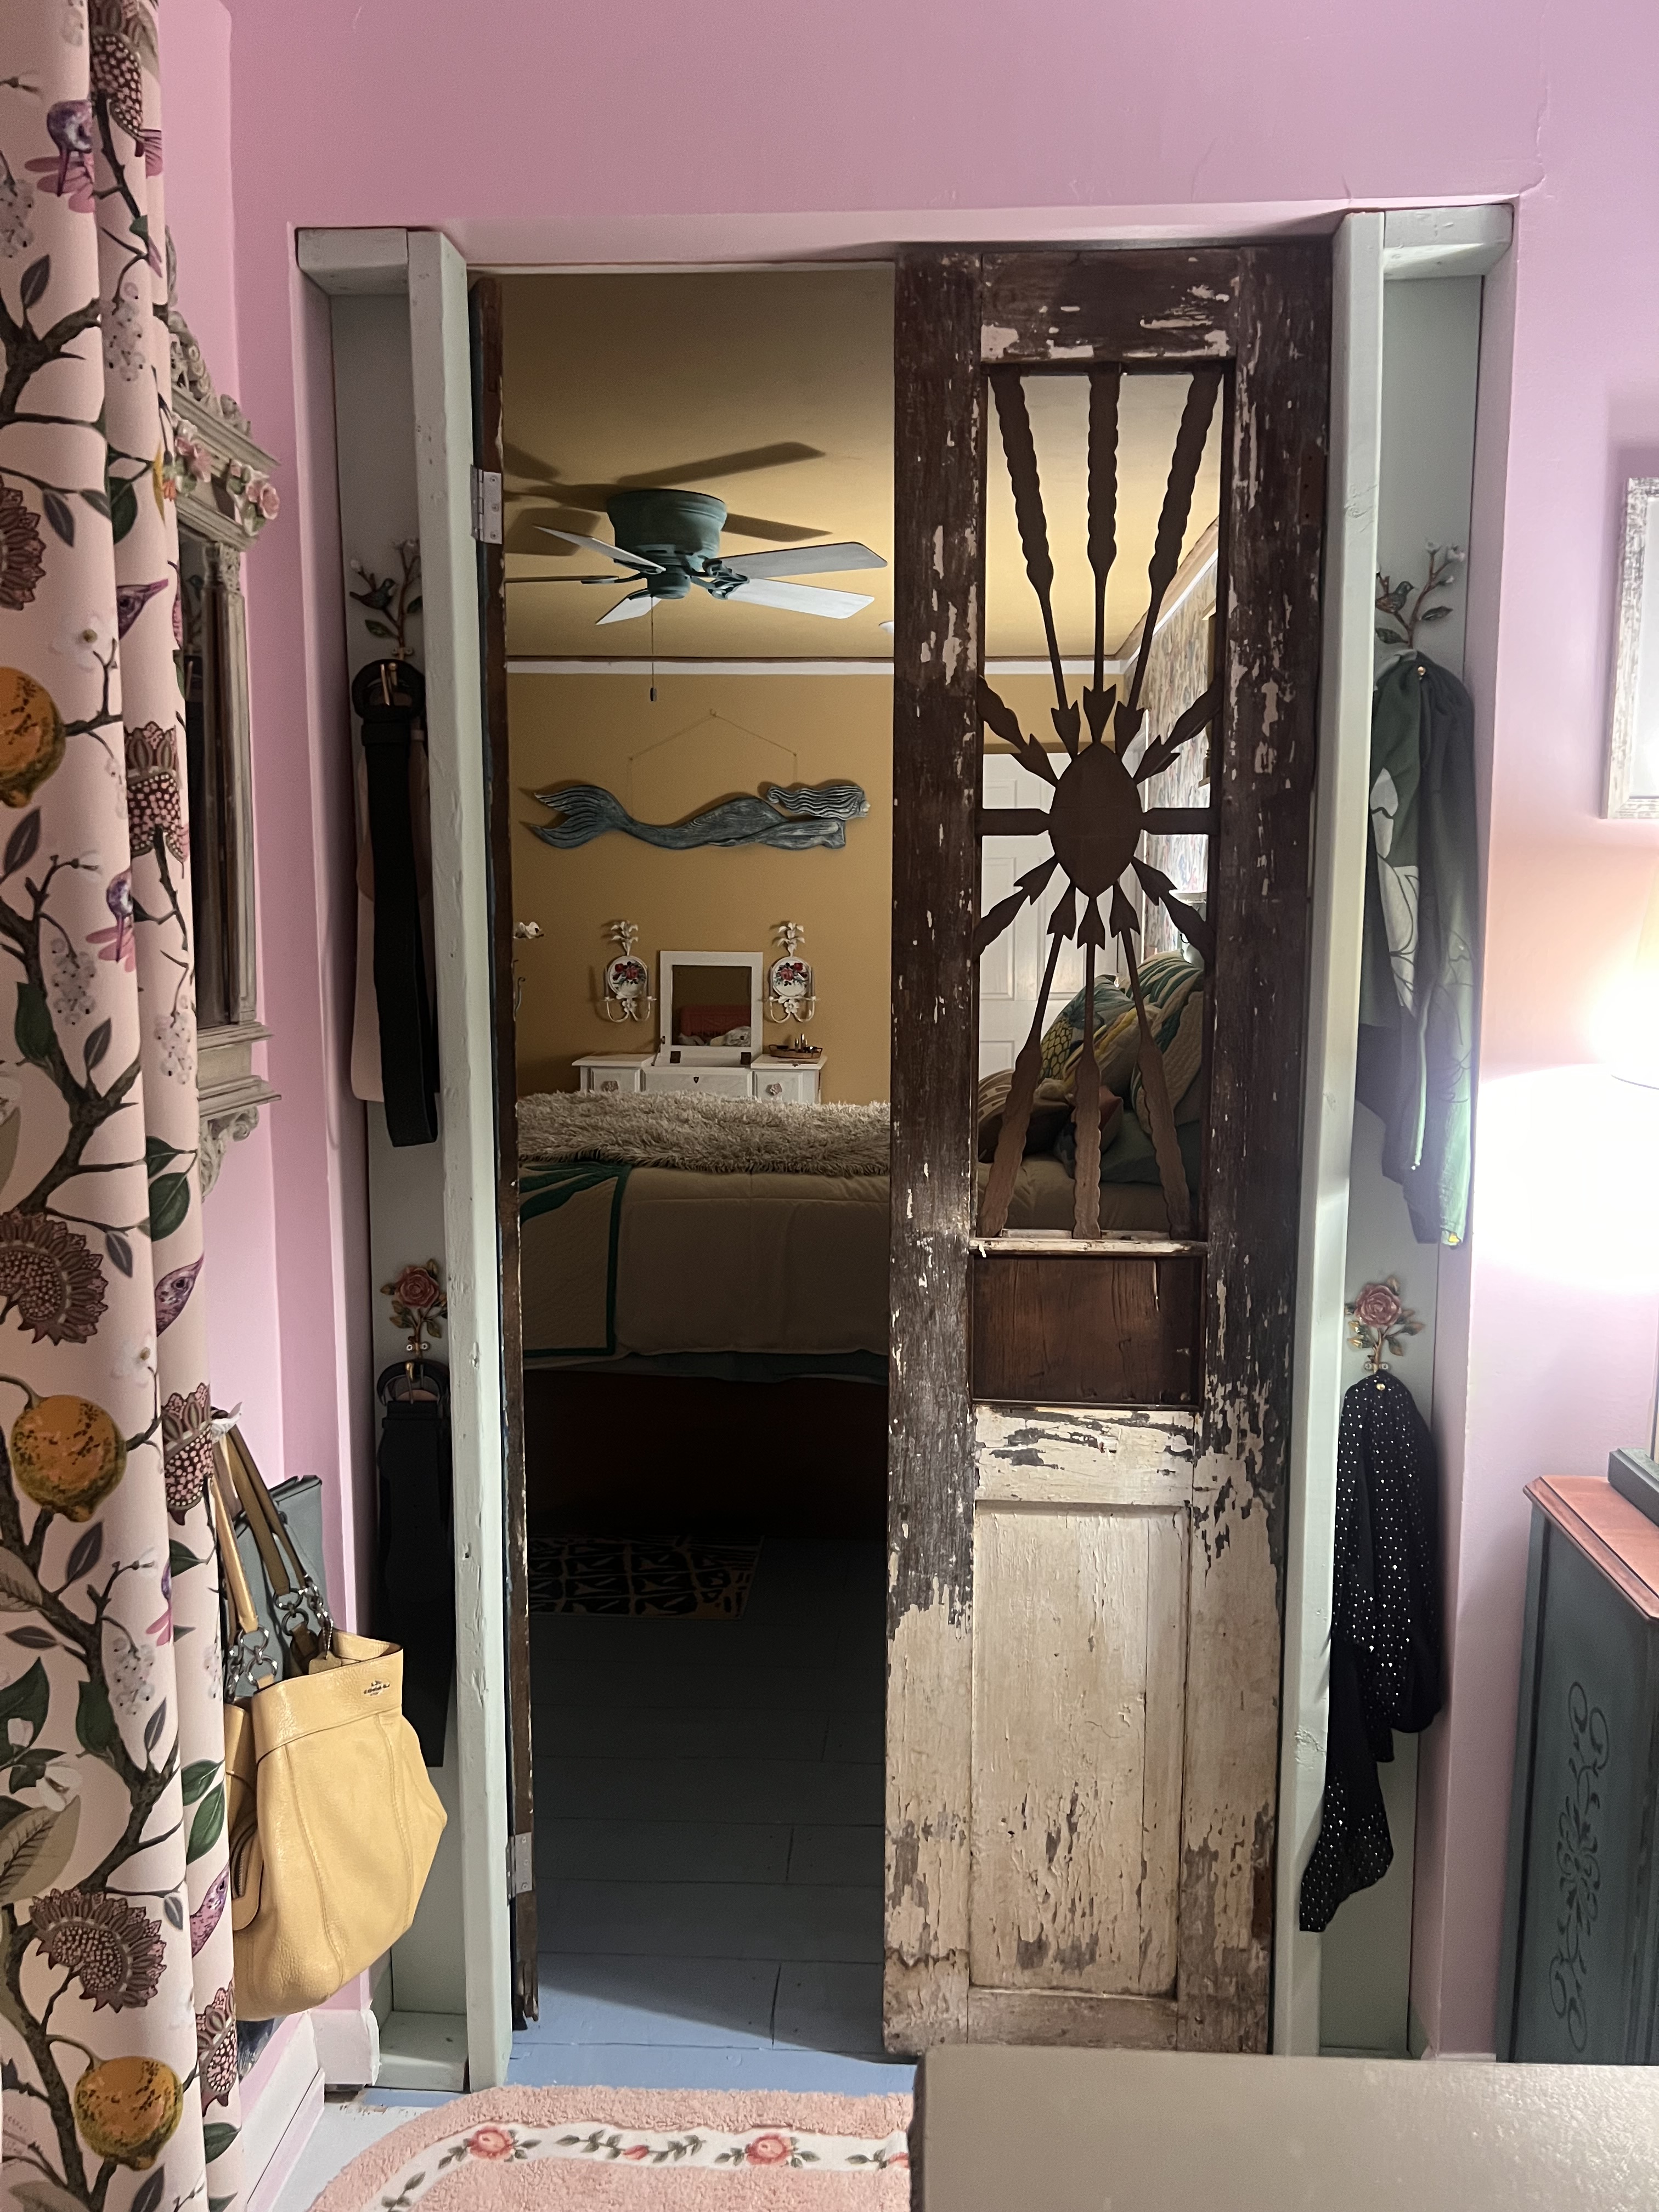

I simply love the look of this finished project! Although it took time to find the right doors, it looks so unique and positively me. I had no knowledge of how to downsize a frame, but the doors look great, let the light in from the closet, are functional, and I even made a bit more storage for hanging items.
Old Doors to New Places
Follow any of my Amazon Associates links throughout the post or below to find the same cute door stoppers, hooks, and dummy door handles I used in this project:

Leave a comment